
Hi friends!! I’m back to share another super easy yet super fun watercolor card with you.

I’m totally loving how this turned out. I used Strathmore 140 lb. Ready Cut Watercolor paper and Delicate Surface Frog Tape to tape it down. I recommend the Delicate Surface instead of the original because I’ve heard that some people have problems with the tape tearing their paper when they try to remove it and I’ve never had a problem with the Delicate Surface tape. It peels off beautifully. I’m also going to use distress inks for this card.

And yes, this is attached to a pizza peel… Hey! It works beautifully. I can tip it by propping the handle up so that the colors will run down or lay if flat if I don’t want the colors to run. For this particular card, I did want the colors to kind of work their way down.
I used Seedless Preserves, Salty Ocean and Peacock Feathers distress inks. I put a layer of color on and then I used my heat tool to dry it.
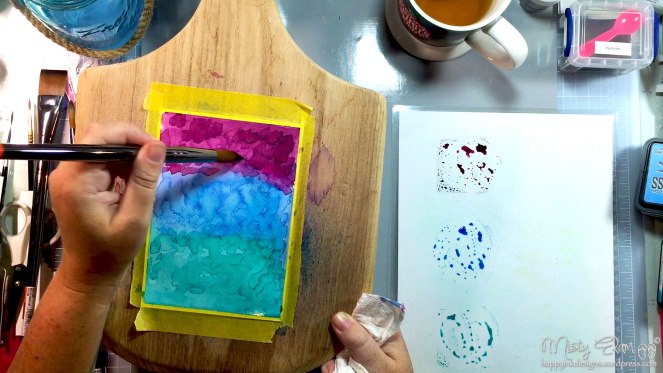
I repeated this process 5 times. You can do it however many times you want, that’s the beauty of watercolors. Once I got the background the way I wanted it, I used Wonky Stitched Rectangle die by MFT to cut my background out.

I was trying to decide which color I wanted at the top and how much of that color I wanted to show.
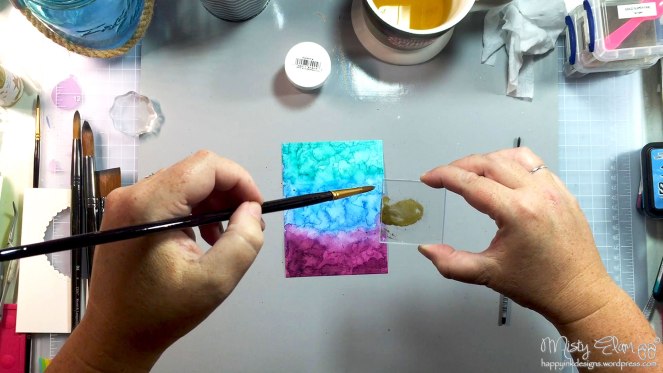
Once I cut the background, I decided to add some paint splatters before I added my sentiment. I used the gold from my Gansai Tambi watercolors to do the splattering. You can also purchase the individual color blocks if you don’t want to purchase the entire set.

Once I had my paint splatters on, I used my Mini Misti to ink up the greeting with VersaMark ink. The watercolor paper is kinda bumpy, especially after hitting it with my heat tool so many times, so the mini Misti is perfect for this.
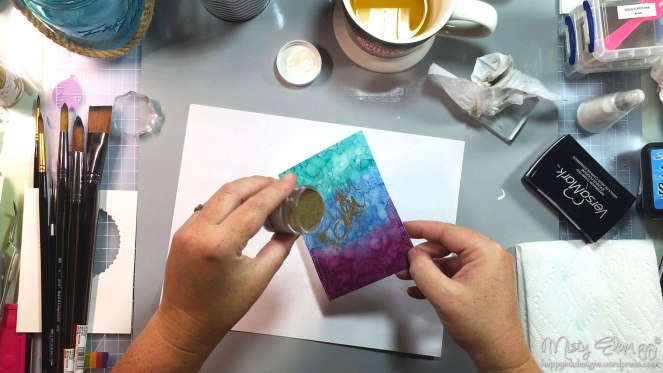
I then added gold embossing powder to my greeting which is from the Thank You Wishes stamp set by Mama Elephant.

Look how gorgeous that gold embossing powder is. This is one of my favorites. After I admired the embossing powder for a minute, I added a few sequins here and there.

I stuck with the gold theme by using Little Things by Lucy’s Cards in Champagne. I always use my smallest acrylic block to keep the sequins pressed down while they dry. When I use my hand to do it, it seems like I always put too much pressure on it and then the glue smooshes out the sides..

The largest of the Wonky Stitched Rectangle die measures 4″x5.25″ so I was planning on just having either a white or black border around it, but it just didn’t look right. I wanted the colors from the watercoloring to take center stage without any competing colors so I just trimmed my card base down to 4″ x 5.25″.

Next I added the sentiment on the inside and I used this really cool transparent grid that you can purchase to use with your Mini Misti. I sometimes have a hard time getting my sentiment straight, especially when it’s a scripty font like this. This grid is perfect for that.

I don’t know how we did it before the Misti was invented. Oh wait, I didn’t. I was just becoming a card maker, I believe.. I love using Intense Black ink by Simon Says Stamp for most of my cards, but I do need to ink it up twice every time. I’m not sure why, but again, this is exactly what the Misti was made for. I can ink it as many times as I want and I know I will get it in the exact location every time.
So the sentiment you see above is from the set Lovely Spring by SSS.
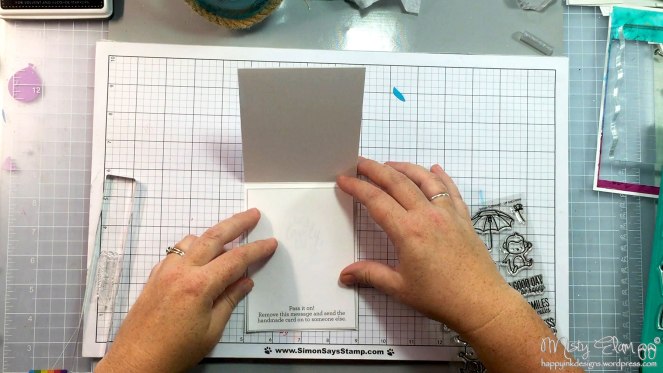
And since this is a Thank You card, I added one of these card inserts that Jennifer McGuire so kindly shared on her blog here. It’s a Pass It On insert so that your recipient can remove your message and reuse your card!! I love using this for Thank You cards especially because it’s like you’re giving your recipient a little gift! I always use removable adhesive to adhere it down.

I added a more personal sentiment for my recipient which is from the Up and Away set from Mama Elephant and a more general sentiment for her to use, if she chooses to reuse this card.

And lastly, I added my message and my card was ready for the mail!! I hope you enjoyed this tutorial. If you would like to see exactly how I made this card, you can go to my YouTube channel and watch me make it by clicking here.
This may be my last post for a week or so. I have a craft fair coming up on Labor Day weekend and I’m spending sooo much time on here and editing my YouTube videos, that I’m not getting any cards made!! But I will be back as soon as possible. I really enjoy this new blog and editing my videos so I won’t be gone long. I can’t. I’ll start having withdrawals. Thanks for understanding. I hope you have a fantabulous day and I’ll catch ya next time ~


Just popping in from Darnell’s blog. Gorgeous work! x
LikeLike
Hi Sammy!! Thank you!! And thanks for stopping by!! I appreciate it. 💜
LikeLike
Misty, I’ve been out of town, catching up today. A gorgeous background and those colors blend so beautifully. Good luck with the craft fair.
LikeLiked by 1 person
Thanks Cat!! Thanks for stopping by as well!! Talk to you soon!
LikeLike
WOW what an incredible background!! This is a fantastic card Misty. Best of luck at your craft fair!
LikeLiked by 1 person
Thank you Lisa!! Isn’t it amazing what distress ink can do?? I love that stuff!! Thanks, I think I’m gonna need all the luck I can get… I just can’t seem to get any cards made!!
LikeLike
I love how this card turned out Misty!! The watercoloring turned out beautiful. Love the gold splatters too!! That is a good idea about the extra sentiment mat, I had forgotten all about that video Jennifer McGuire did. need to keep this in mind myself. Loved watching the video to this card too. Good luck with the craft fair!!! Hugs, Brenda
LikeLiked by 1 person
Thanks Brenda!! I did too, it took me awhile to find it but now I’m so glad I did. My recipient told me she doesn’t want to pass the card along though, so it turns out I didn’t need it… But I’m still glad I used it in case she changes her mind. Oh, thank you for watching the video too!! I’m always so nervous in those darn things. But I’m a visual person so I love watching other people’s videos, which is one of the reasons I started doing my own. Anyway, thanks a bunch Brenda!! Good luck to you too this week with getting your house put back in order!!
LikeLike