We are showcasing Memory Box Products this week. If you have any of these products, we’d love to see them used, but it’s certainly not a requirement to join the challenge.
As always, the generous folks at Simon Says Stamp will be giving away a $25 voucher to one randomly selected winner to shop at the fabulous Simon Says Stamp Store. You can enter 5 times which means you can make 5 different projects following this week’s prompt and have 5 chances to win a shopping spree!! Sounds like a win/win to me!! I’ve linked all of the supplies that I used at the end of this post. Compensated affiliate links used where possible at no cost to you.
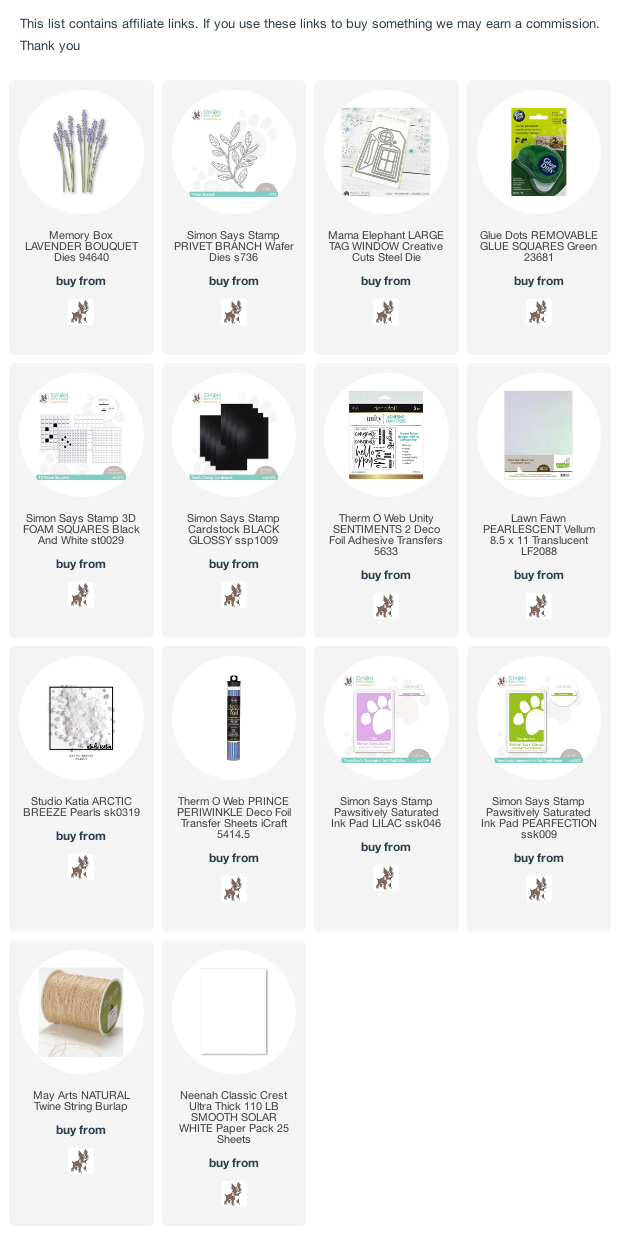
I decided to make a tag for this challenge because I love adding tags to gifts but I never make the time to make the tags!! I used a very large tag die by Mama Elephant called Large Tag Window Creative Cuts and I die cut it using Glossy Black Card Stock. For the back, I used a piece of Neenah woodgrain kraft card stock so I can add a message to my tag.
I just recently purchased Lawn Fawn’s Pearlescent Vellum and it is so beautiful! I’m in love with it and it complimented the lavender nicely so I used it to cut the Privet Branch die twice.
We are showcasing Tim Holtz Products this week. If you have any of these products, we’d love to see them used, but it’s certainly not a requirement to join the challenge.
As always, the generous folks at Simon Says Stamp will be giving away a $25 voucher to one randomly selected winner to shop at the fabulous Simon Says Stamp Store. You can enter 5 times which means you can make 5 different projects following this week’s prompt and have 5 chances to win a shopping spree!! Sounds like a win/win to me!! I’ve linked all of the supplies that I used at the end of this post. Compensated affiliate links used where possible at no cost to you.
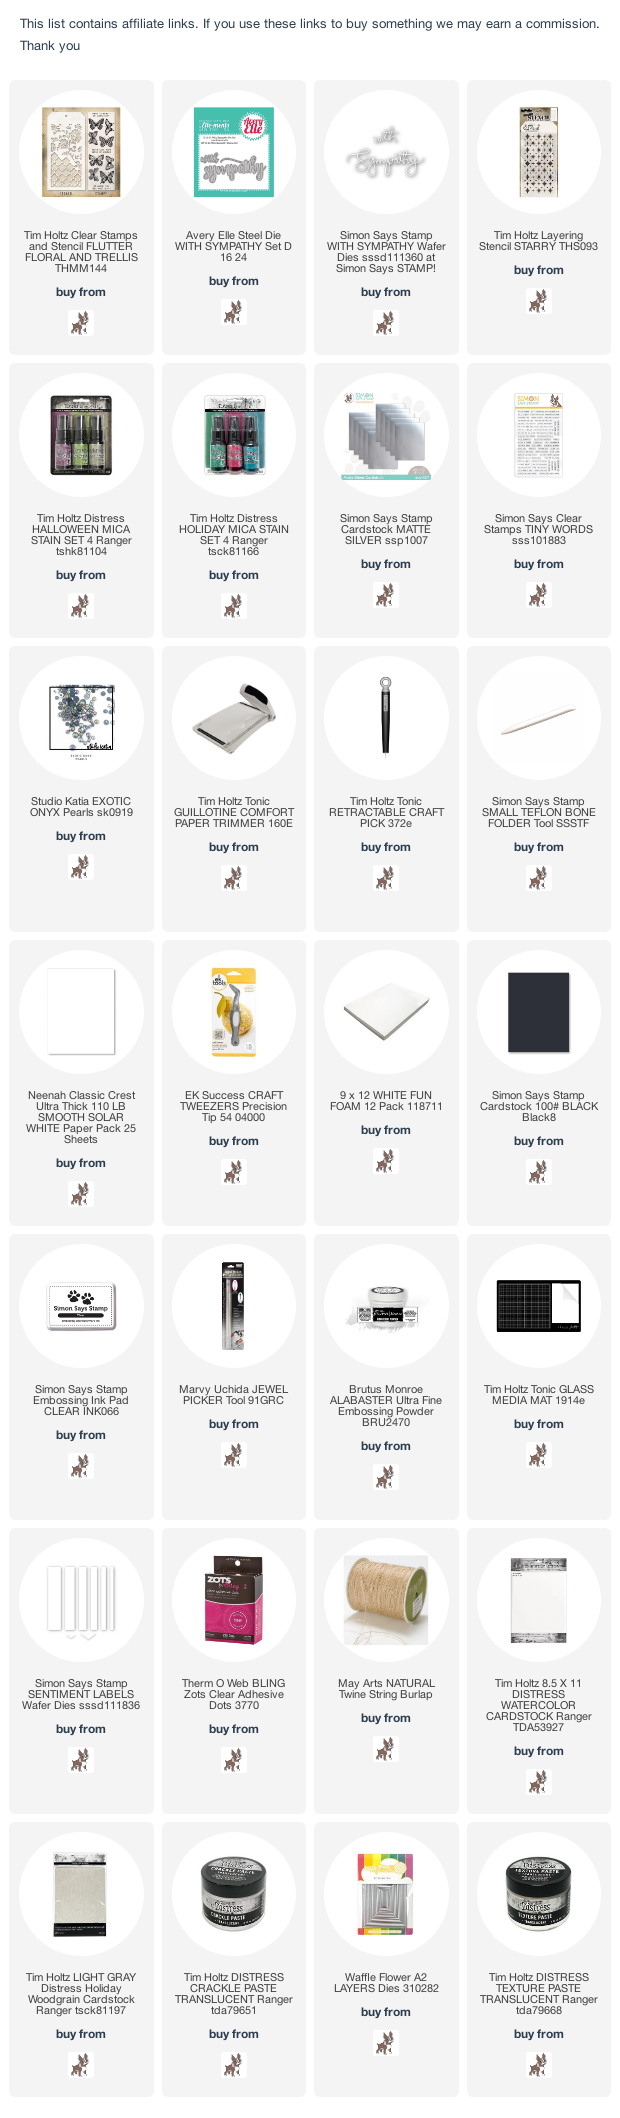
I had a field day with mica stains this week. I’ve never used them before and was excited to try them out so I made several backgrounds. I used the same color on them because I wanted to be able to compare them. Can you believe that the top 3 and bottom right are all the exact same stains used, just different mediums?? I just can’t get over how different they look!! I used a Tim Holtz stencil called Flutter, Floral and Trellis for the top 3 and bottom right. The top left was done on Tim Holtz Watercolor card stock and the others I used Black Card Stock.
These are the two backgrounds I decided to use for this challenge. The stains I used are Fortune Teller from one of the Halloween sets and Shiny Bauble from one of the Holiday sets.
I LOVE how this background turned out!! I used Translucent Crackle Paste and I love all of the colors that pop out of this and the pearlescent. I trimmed it down using one of my A2 Layers die. My sentiment is from Avery Elle and it’s called With Sympathy. I used Matte Silver Card Stock for the top layer of my sentiment and I cut it out two more times using the same card stock as my background. The believe the card stock is called Fired Brick and I had it in my stash.
The combination of the crackle paste and the pearlescent stain is just beautiful, in my opinion.
I popped my front panel up with some Craft Foam and tied some Burlap Twine around it a few times. I trimmed my background panel down just a bit so that I would have a white border around the entire card.
To finish off this card, I added a few Exotic Onyx Pearls from Studio Katia.
This card was done very similar to the above card. The only difference is I used Translucent Embossing Paste (no crackle this time) and my sentiment is from Simon Says Stamp, also called With Sympathy. My sub-sentiment is from the Tiny Words Stamp Set.
Hello, hello, hello!! Welcome to Day 2 of the Holiday Sparkle Blog Hop. As always, I’m super excited and honored to be a part of this hop so let’s get crafty.
GIVEAWAY INFO:
Let me start off by sharing the above blog hop exclusive code. If you spend $50 or more and enter code: CUTEBAG you will receive this adorable zipper pouch for free!! This offer is valid while supplies last or until November 13 at 11:59pm EST. How cute are the little snowflakes and paw prints??
Simon Says Stamp is ALSO giving away a $25 coupon to every stop on the hop from our comments section so be sure to comment on every stop to increase your chances of winning!! Simon will announce the winners on the Simon Says Stamp Blog on Wednesday, November 16.
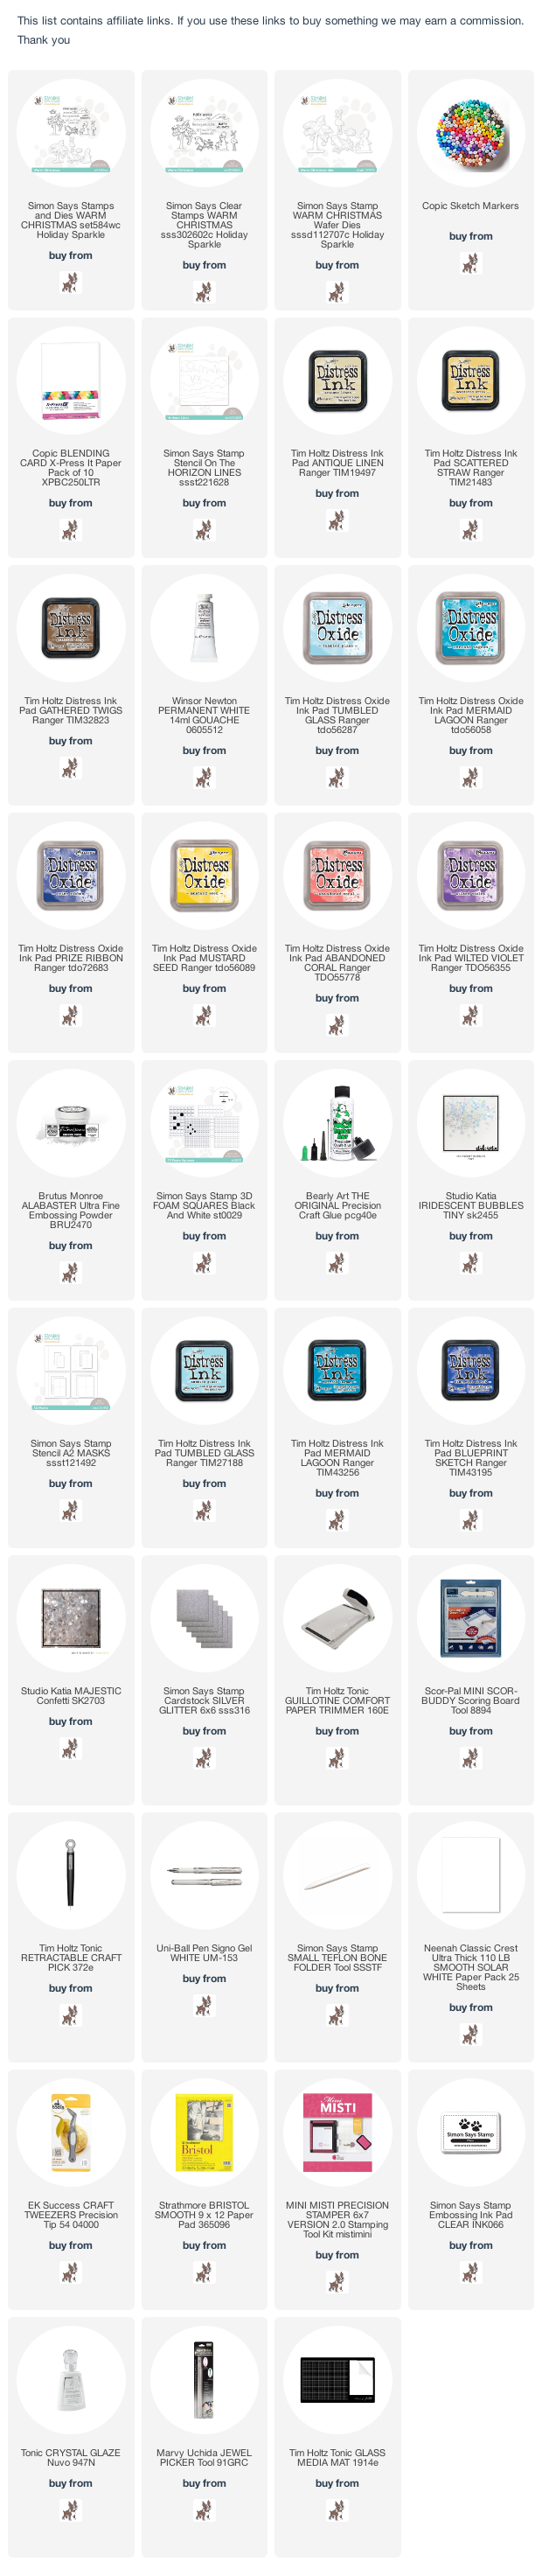
I used the Warm Christmas Stamp Set from this release and let me tell ya, this is my kinda holiday!! Oh how I wouldn’t give to spend the holidays on the beach somewhere warm and sandy. In fact, I just might have to add that to my bucket list.
So for this card, I started out by coloring all of my images with my Copic markers on X-Press It Copic Blending Card. I fussy cut them all and set them aside to move on to the ink blending. For my sand, I created my own stencil awhile back and it was perfect for this card. I had the On the Horizon Lines Stencil in mind and at the time it was out of stock so I thought, I have the stencil material, why not create my own hilly landscape. Starting off with an A2 size piece of Bristol Smooth Card Stock, I masked off the top of the panel and used Antique Linen, Scattered Straw and Gathered Twigs Distress Inks to create my sand. I splattered the sand with Gathered Twigs mixed with a little water and then with White Gouache and water.
I used the other half of the homemade stencil and just a straight edge from another stencil and masked off the sand to work on my ocean. I ink blended Tumbled Glass, Mermaid Lagoon and Prize Ribbon Distress Oxide inks for my ocean. I reversed the straight edge of a stencil so I could move on to my sky. I ink blended Mustard Seed, Abandoned Coral and Wilted Violet Distress Oxide inks for the sky.
To add a little interest to my sky, I added a few rolling clouds by adding a little water with a fine paintbrush. I heat embossed my sentiment using Alabaster White Embossing Powder. I trimmed my entire panel down to 4″ x 5.25″ and I started to assemble my card.
I popped Santa and the palm tree up with some 3D Foam Squares and then I glued everyone else into place using my Bearly Art Craft Glue. To make my tree shine a bit, I added Crystal Glaze over all of the lightbulbs and the round ornaments. I also added a touch on the Blue Hawaiian cocktail that Santa is enjoying. For a final touch I added a few Tiny Iridescent Bubbles by Studio Katia. I attached my card panel to a top folding landscape card base.
For my second card, I used this adorable snowman from the same Warm Christmas Stamp Set. I started out with an A2 size piece of Bristol Smooth Card Stock. I used my homemade stencil to mask off the sky and did the sand the same way as I did above. I went a little heavier with the Gathered Twigs though. I also used one of the A2 Masks Stencil to keep this card clean and simple.
I masked off the sand and worked on my sky. I ink blended Tumbled Glass, Mermaid Lagoon and Blueprint Sketch Distress Inks. I set that aside to dry and I colored my snowman. I know this isn’t going to sound good but I fussy cut the snowman out and I respectfully trimmed off his arms as they were too thin to fussy cut.
Before gluing my snowman in place, I stamped him on my background panel so that his arms would no longer be missing. See, no snowman was harmed during the making of this card.
Now that I’ve shared what I made, it’s your turn!! When you get your goodies from this latest release, be sure to add your projects to the Holiday Sparkle release gallery and anywhere else you choose to share on social media! We LOVE seeing what you all create.
If you haven’t checked out Day 1 of the Holiday Sparkle Blog Hop, then click HERE to be directed to even more inspiration!!
Hello all. I’m so excited to share the newest release by Simon Says Stamp called Holiday Sparkle. Click HERE to be taken to the entire release. You do NOT want to miss this one. Be ready to fill that shopping cart!! I told myself I wasn’t going to place another order until next month, but I can already tell you that that’s not going to work.
I made a card to share with you specifically for this release. I used the Warm Christmas stamp set to make this card. Stay tuned because I’ve made a few more that I’ll be sharing very soon.
This card is super cool because it glows in the dark!! But let’s back up and start from the beginning. I started out with an A2 sized piece of Bristol Smooth Card Stock. I also made a second card using Neenah Solar White 110 lb. card stock because I wanted to compare the differences in the background. To be honest, they look pretty much identical. I think the color blend is slightly better on the bristol smooth card stock but not much at all.
I made a hilly mask using stencil material for a previous card and it was perfect for this card too. I made it myself because at the time I wanted the On the Horizon Lines Stencil but it was out of stock so since I have the stencil material on hand, I thought I’d just quickly make it myself until I can get my hands on the On the Horizon Lines stencil. I masked off the sky and covered the bottom of my panel with Simon Says Stamp Clear Ink. I also used a VersaMarker to get right up next to the mask.
I colored the palm tree from the Warm Christmas stamp set with my Copic Markers and I fussy cut it out. I decided I wanted to try Lawn Fawn’s Glow In the Dark Stencil Paste on the lightbulbs to see if it was enough to make them glow and it is! They do!! I tried to capture it in a photo but I didn’t capture it well. I stamped the palm tree on my background panel so I could trim off the hanging ornaments making it much easier to fussy cut.
I attached my panel to a side folding card base and my card was complete! I didn’t add any embellishments because I wanted to keep it simple and I thought the stars in the night sky were enough.
We are showcasing Paper Rose Products this week. If you have any of these products, we’d love to see them used, but it’s certainly not a requirement to join the challenge.
As always, the generous folks at Simon Says Stamp will be giving away a $25 voucher to one randomly selected winner to shop at the fabulous Simon Says Stamp Store. You can enter 5 times which means you can make 5 different projects following this week’s prompt and have 5 chances to win a shopping spree!! Sounds like a win/win to me!! I’ve linked all of the supplies that I used at the end of this post. Compensated affiliate links used where possible at no cost to you.
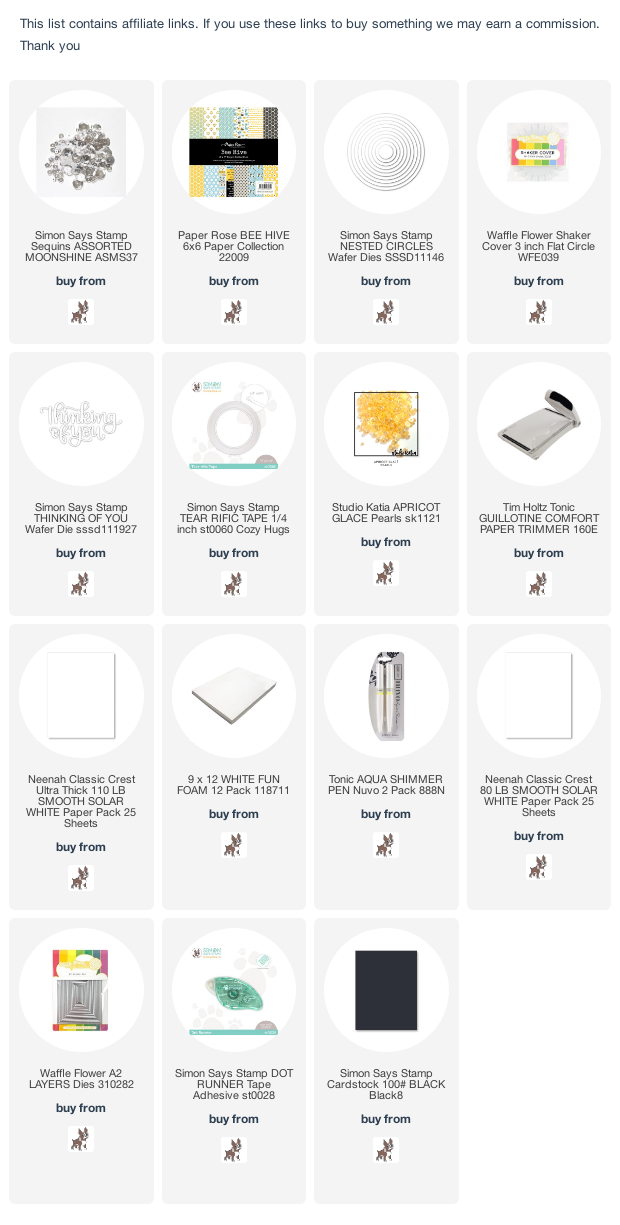
I decided to make a shaker card this week because I’ve never used the Waffle Flower Shaker Covers and I wanted to try it out and see how easy it would be. I actually like how it turned out and I didn’t have to mess around with craft foam or foam tape or sequins running away on me.
For the back of my shaker, I took one of the Nested Circles die by Simon and cut a coordinating patterned paper. Then I placed the patterned paper circle inside a 3 inch Circle Shaker Cover and started folding all of the sides in but leaving the top open so I could add my sequins. I used Tape Runner to keep all of the flaps in place because I didn’t want any shaker bits escaping.
I added my sequins and sealed the top of the shaker cover. I glued it on my card front using some Tear Rific 1/4″ Tape. For my sentiment I used the Thinking of You die by Simon Says Stamp. I cut it out twice, once in black and once in white. I glued them together with a slight offset so it would stand out a bit.
We are showcasing the fabulous Hero Arts Products this week. If you have any of these products, we’d love to see them used, but it’s certainly not a requirement to join the challenge.
As always, the generous folks at Simon Says Stamp will be giving away a $25 voucher to one randomly selected winner to shop at the fabulous Simon Says Stamp Store. You can enter 5 times which means you can make 5 different projects following this week’s prompt and have 5 chances to win a shopping spree!! Sounds like a win/win to me!! I’ve linked all of the supplies that I used at the end of this post. Compensated affiliate links used where possible at no cost to you.
For my sub sentiment I used an old Simon stamp set that’s unfortunately no longer available but it was called Thankful Heart. I reversed the colors for the sub sentiment. I stamped it in Dark Chocolate Ink on Ivory Card Stock. I popped the sub sentiment up a touch using 3-D Foam Squares.
I used one of the fine frames from the Fine Frames Cover Dies by Altenew to frame in my top panel using Tonic’s Honey Gold Mirror Gold Satin Card Stock. I popped my top panel up using Craft Foam and used more of that Dark Chocolate Card Stock to frame in my top panel. Before I attached my card front to the dark chocolate frame, I used some Burlap Twine and wrapped it around my front panel a few times and attached a few acorns from an old card kit from Simon. Then I tied a bow and attached it using a tiny adhesive dot called Bling Zots.
Then I attached my card front to the dark chocolate and ivory frames. I used a side folding ivory card base to match the rest of the ivory and my card was complete!