Cardmaking · Challenges · Design Team · Handmade Greeting Cards · Simon Says Stamp

Skulls and Lace

Hello crafty friends!! It’s time for a brand new challenge at the Simon Says Stamp Wednesday Challenge.  This week the challenge is

We are showcasing Tim Holtz Products this week.  If you have any of these products, we’d love to see them used, but it’s certainly not a requirement to join the challenge. 

As always, the generous folks at Simon Says Stamp will be giving away a $25 voucher to one randomly selected winner to shop at the fabulous Simon Says Stamp Store.  You can enter 5 times which means you can make 5 different projects following this week’s prompt and have 5 chances to win a shopping spree!! Sounds like a win/win to me!! I’ve linked all of the supplies that I used at the end of this post. Compensated affiliate links used where possible at no cost to you.

Once again, I made two cards for this challenge. I had to balance out the masculine with the feminine because not only was it my husband’s Birthday yesterday, but it was also my Mother-in-Laws. I love how these two balance each other out.

I started out with an A2 sized piece of black card stock. I prepped it with my anti static powder and heat embossed the Bubbles stamp set by Tim Holtz using clear embossing powder.

I set my background aside and started working on the center piece. Taking a piece of slate card stock, I stenciled this cool crossbones stencil by Tim Holtz with distress texture paste in black. Once that was dry, I die cut this kinda tombstone-y shape using a nested globe die.

I popped my centerpiece up with some craft foam and added a few screws hardware brads to the bottom.

For my sentiment, I used one of Yana’s layered script sentiments dies for the Birthday portion and the “wishes” was a stamp I had in my stash. I used Tim’s Idea-ology metallic kraft stock for the top layer of the “Birthday” and then I added 2 more layers using black card stock.
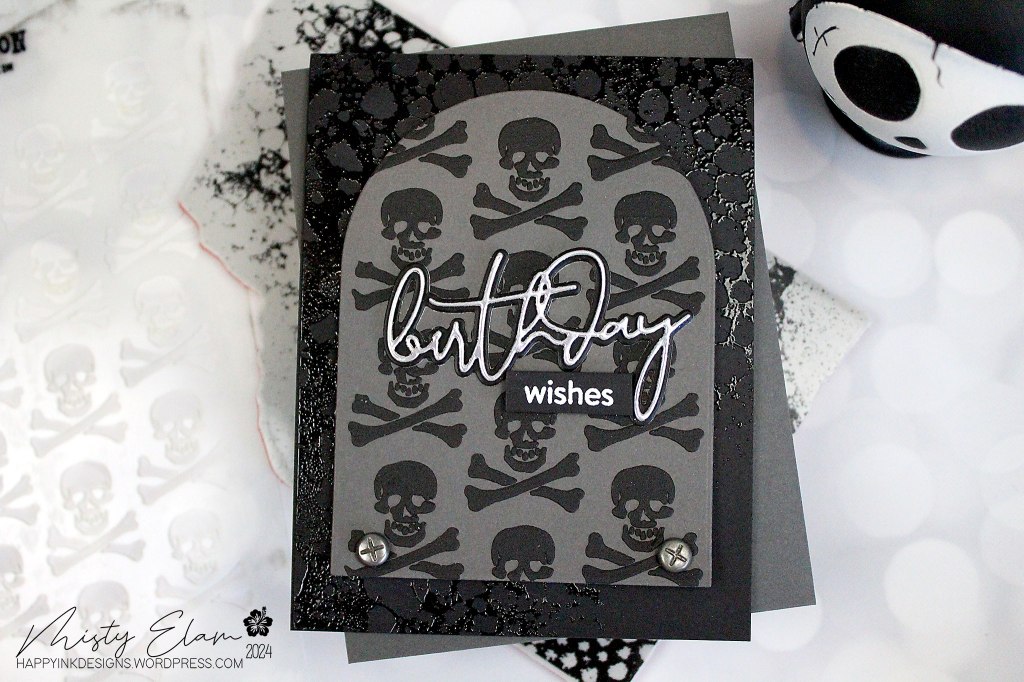
I heat embossed the “wishes” with white embossing powder and I popped it up with a black foam strip.

For this next card, I’m just going to add a few pictures. It’s pretty self explanatory but unfortunately I took a break to go to dinner for my hubby’s Birthday last night and then I felt like crud afterwards so I’ll be lucky to even get this post done at this point. Unfortunately, this is now my life. As soon as I eat anything by mouth, I feel awful until the food has passed through me. Most of the time I get sick which is why I’m on IV food for the rest of my life for the nutrition. Most of the food I eat by mouth just comes out the tube I have in my stomach but if it doesn’t come out fast enough, it makes me sick. But, at least I’m alive and I’m home, not stuck in a hospital so I’m not complaining. Hope you enjoy these cards I made this week!

So now it’s YOUR turn. Happy Crafting!!    

Follow Simon Says Stamp on Instagram

  Do you use Instagram ?  If so please add  #ssswchallenge to your challenge entry uploads so we can see them on there too.

   You have until Wed  8am Ohio time. 1pm UK time, 2 pm CET to join in

Cardmaking · Challenges · Design Team · Handmade Greeting Cards · Simon Says Stamp

Slimline Reveal Wheel

Hello crafty friends!! It’s time for a brand new challenge at the Simon Says Stamp Wednesday Challenge.  This week the challenge is

We are showcasing Lawn Fawn Products this week.  If you have any of these products, we’d love to see them used, but it’s certainly not a requirement to join the challenge. 

As always, the generous folks at Simon Says Stamp will be giving away a $25 voucher to one randomly selected winner to shop at the fabulous Simon Says Stamp Store.  You can enter 5 times which means you can make 5 different projects following this week’s prompt and have 5 chances to win a shopping spree!! Sounds like a win/win to me!! I’ve linked all of the supplies that I used at the end of this post. Compensated affiliate links used where possible at no cost to you.

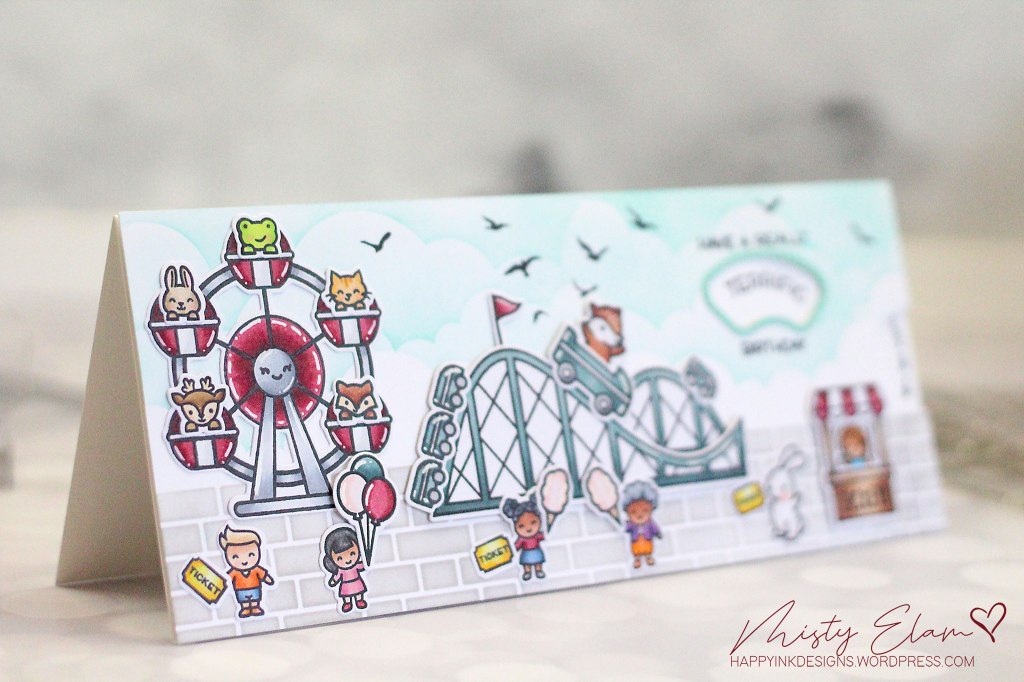
I had so much fun making these interactive cards. I had never made a reveal wheel card until this challenge. Lawn Fawn makes a really great video showing exactly how to make these interactive cards so if you’d like to see the mechanics of it all, just click HERE and I’ll take you to that video.

So this card was a little different because the Reveal Wheel is made for an A2 sized card, but I wanted to change that up a bit. So I basically took the reveal wheel die, lined up the cutouts on my card front where I wanted them, I traced the side notch where you turn the wheel and then I kept the original cutout window in place by taping it down and ran just that through my die cutting machine. So it left me with just the cutout window where the words are going to change. The reveal part of the wheel. Then I hand cut the side notch where you turn the wheel.

I had to do this a couple times because I kept cutting it either too high or too low. It has to be right in the center so that I can fit foam tape above the wheel and below the wheel. Now I really wish I would have taken pictures as I went. Once I got the opening cut in just the right place, the rest was easy peasy.

The stamp sets and coordinating dies that I used were Lawn Fawn’s Reveal Wheel, Coaster Critters (which unfortunately are no longer available at Simon), Coaster Critters Flip Flop, Wheely Great Day, Tiny Friends, Reveal Wheel Sentiments, Reveal Wheel Arc Frame Add On along with the Reveal Wheel Essential Shapes Templates, which make putting this all together a breeze. I colored all of my images with my Copic Markers, die cut them and then set them aside.

I made a very simple background using more Lawn Fawn products. I used the Cloudy Stencil for the sky and the Brick Stencil for the ground. I put my reveal wheel together and then I started adding all of my little characters.

I popped some up with foam squares but I only used the .04″ foam squares since the entire card front is already popped up with foam tape. That’s what makes the wheel actually able to turn.

To finish off my scene, I added a few birds from various stamps in my stash. I added some finishing touches using my white gel pen and my Reveal Wheel Slimline was complete.

So this was actually the first card I made. I made the A2 card first just so I could figure out how the reveal wheel worked and then I stepped it up a notch and made the slimline, mimicking the reveal wheel since the reveal wheel die is for a standard A2 sized card.

For this card I used Lawn Fawn’s Reveal Wheel die cuts along with Wheely Great Day, Tiny Friends and the Reveal Wheel Wheely Great Day Add On dies. I also used the VERY handy Reveal Wheel Wheely Great Day Templates. The interactive part is super easy with the reveal wheel die cuts. The coloring is what took me the longest on this one.

Once I was done with the coloring, I set all the images aside and worked on my background.

I used Lawn Fawn’s Cloudy Stencil with some Merman ink to create my sky and I did this using Hammermill 100 lb. Card Stock. For the grass, I used Bristol Smooth card stock and I ink blended Mowed Lawn and Twisted Citron. I cut the grass using Lawn Fawn’s Slimline Grassy Hillside Borders die.

I used a Sentiment Labels die by Simon to cut out my banner and I fishtailed the ends with my scissors. The sentiment is from the Coaster Critters stamp set that unfortunately isn’t available at Simon anymore, but is at Lawn Fawn’s site. The bottom sentiment is from the Reveal Wheel Sentiments Stamp Set. I heat embossed the sentiment using Alabaster White Embossing Powder. I attached my reveal wheel to a piece of Sea Glass Card Stock and I attached everything to a top folding card base.

So now it’s YOUR turn. Happy Crafting!!    

Follow Simon Says Stamp on Instagram

  Do you use Instagram ?  If so please add  #ssswchallenge to your challenge entry uploads so we can see them on there too.

   You have until Wed  8am Ohio time. 1pm UK time, 2 pm CET to join in

Cardmaking · Challenges · Design Team · Handmade Greeting Cards · Simon Says Stamp

Happy Birthday Simon

Hello crafty friends!! It’s time for a brand new challenge at the Simon Says Stamp Wednesday Challenge.  This week the challenge is

We are showcasing products from the one, the only Simon Says Stamp this week.  And it just so happens to be Simon’s 15th Birthday!! A great big HAPPY BIRTHDAY to Simon for 15 years in this beautiful business. I’d say 90% of my craft room is from Simon so I honestly don’t know where my passion would be without them. So if you have any Simon Says Stamp products (which let’s be honest, most of us do if you’re here reading this), we’d love to see them used, but it’s certainly not a requirement to join the challenge. 

As always, the generous folks at Simon Says Stamp will be giving away a $50 voucher to one randomly selected winner to shop at the fabulous Simon Says Stamp Store.  You can enter 5 times which means you can make 5 different projects following this week’s prompt and have 5 chances to win a shopping spree!! Sounds like a win/win to me!! I’ve linked all of the supplies that I used at the end of this post. Compensated affiliate links used where possible at no cost to you.

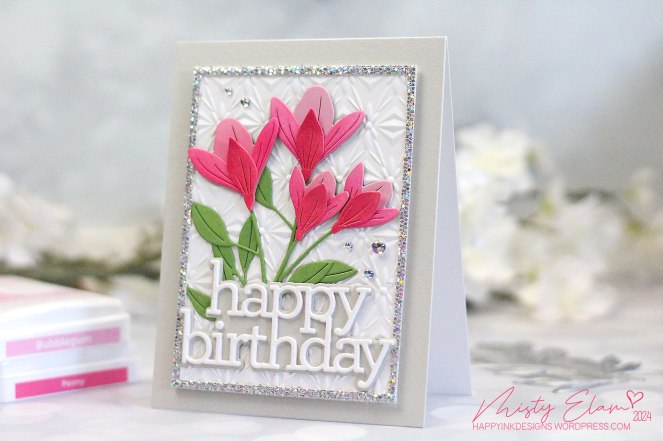
I love how this card turned out. I started out with an A2 sized piece of Neenah Solar White 80 lb. Card Stock and I embossed it using this gorgeous embossing folder called Sparkling Facets by Simon Says Stamp. This is about the only time I use the 80 lb. card stock anymore is for embossing. Usually I use the 110 lb. for most of my projects.

Cathy Zielske did this wonderful video recently where she colored the petals of this die to get more color variations and I knew I had to follow suit. The die I’m using is called Layered Perky Flower. To see Cathy’s video, you can click here. I die cut this image first in Green Leaf Card Stock and then again in Cotton Candy. I ink blended all three petals using Bubblegum, Peony and Watermelon Pawsitively Saturated Inks.

I cut out a frame using Simon’s A2 Thin Frames and this gorgeous Luxe Glitter Card Stock. I then trimmed my embossed panel down to fit inside the frame. Look at that lovely sparkle!!

For my sentiment, I used CZ Design’s Happy Birthday die. I die cut the top layer 3 times so that I could stack them and add dimension and I used Fog Gray Card Stock for the shadow layer.

Next I started to put everything together. I used a top folding card base and I attached an A2 size fog gray background. I adhered my glitter frame to the embossed panel but then I wanted to pop that next panel up a bit so I used some craft foam to do that. I glued my flowers in place and then I attached the sentiment.

To finish off my design, I added a few Iridescent Color Drops here and there.

So now it’s YOUR turn. Happy Crafting!!    

Follow Simon Says Stamp on Instagram

  Do you use Instagram ?  If so please add  #ssswchallenge to your challenge entry uploads so we can see them on there too.

   You have until Wed  8am Ohio time. 1pm UK time, 2 pm CET to join in

Cardmaking · Challenges · Design Team · Handmade Greeting Cards · Simon Says Stamp

With Sympathy

Hello crafty friends!! It’s time for a brand new challenge at the Simon Says Stamp Wednesday Challenge.  This week the challenge is

We are showcasing Hero Arts Products this week.  If you have any of these products, we’d love to see them used, but it’s certainly not a requirement to join the challenge. 

As always, the generous folks at Simon Says Stamp will be giving away a $25 voucher to one randomly selected winner to shop at the fabulous Simon Says Stamp Store.  You can enter 5 times which means you can make 5 different projects following this week’s prompt and have 5 chances to win a shopping spree!! Sounds like a win/win to me!! I’ve linked all of the supplies that I used at the end of this post. Compensated affiliate links used where possible at no cost to you.

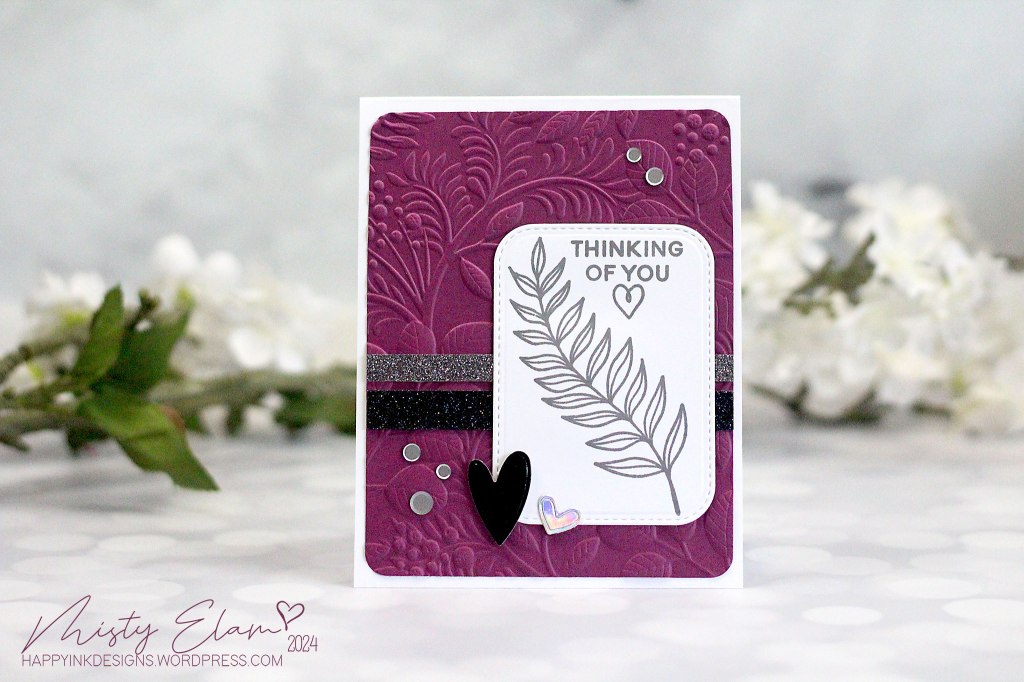
I really struggled with this week’s challenge for some reason. No matter what I made, I just wasn’t happy with it. This was the best of all 4 cards I made. And the bonus is that it was super easy to make! I started out with an A2 sized piece of Plum Punch card stock and I embossed it using Simon’s Vine Canopy embossing folder.

I used an old MFT stitched rectangle die that I had in my stash and I die cut a small rectangle. Then I used a stamp set called With Sympathy by Hero Arts and I stamped some images on my small rectangle.

I trimmed a couple of strips of glitter card stock from Altenew’s Glitter Gradient Card Stock Set Milky Way and I adhered them to my embossed panel. I attached the small rectangle over the top of the glitter strips and then I attached the entire panel to a top folding card base. To finish her off, I added a couple of hearts from various dies and popped them up with some foam squares. Lastly, I added a few Satin Silver Sequins and my card was complete.

So now it’s YOUR turn. Happy Crafting!!    

Follow Simon Says Stamp on Instagram

  Do you use Instagram ?  If so please add  #ssswchallenge to your challenge entry uploads so we can see them on there too.

   You have until Wed  8am Ohio time. 1pm UK time, 2 pm CET to join in

Cardmaking · Design Team · New Releases · Simon Says Stamp

New Release!! Be Bold

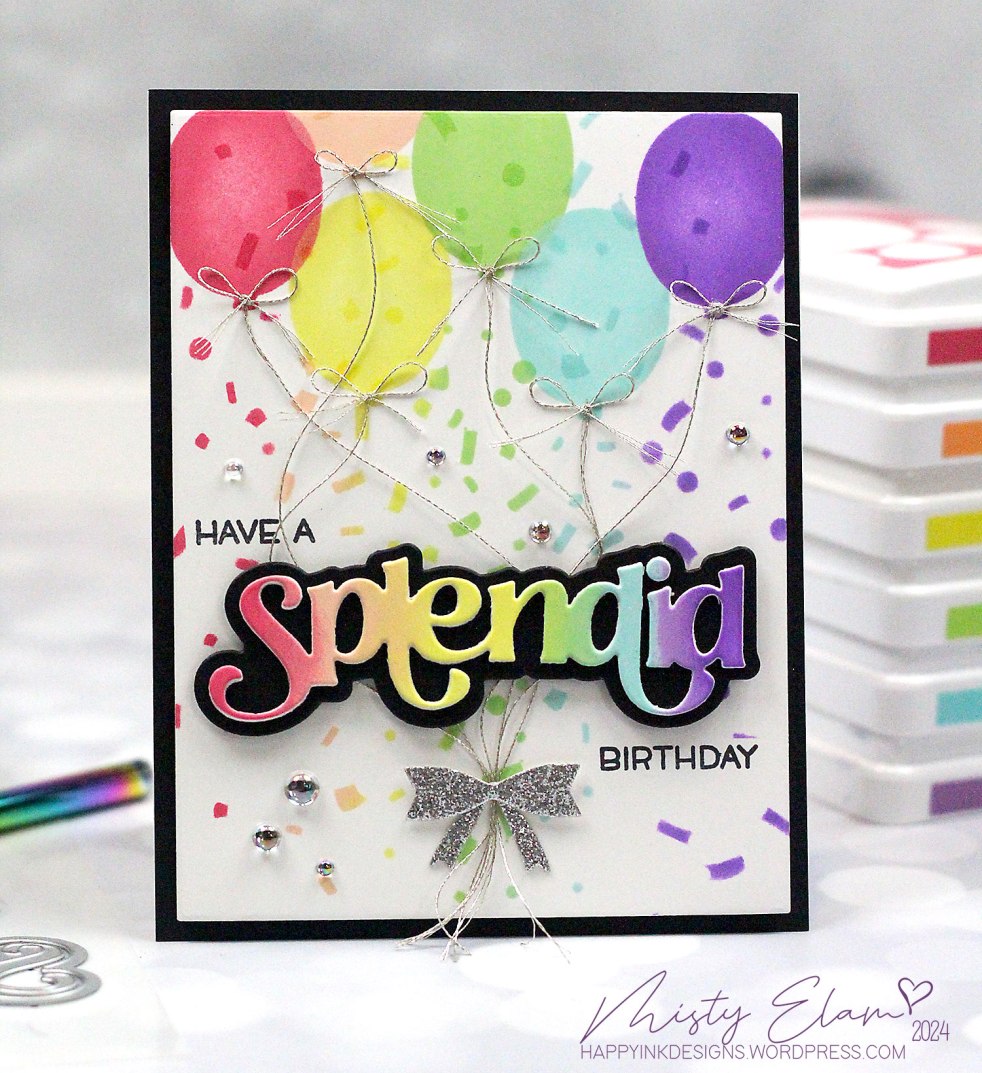
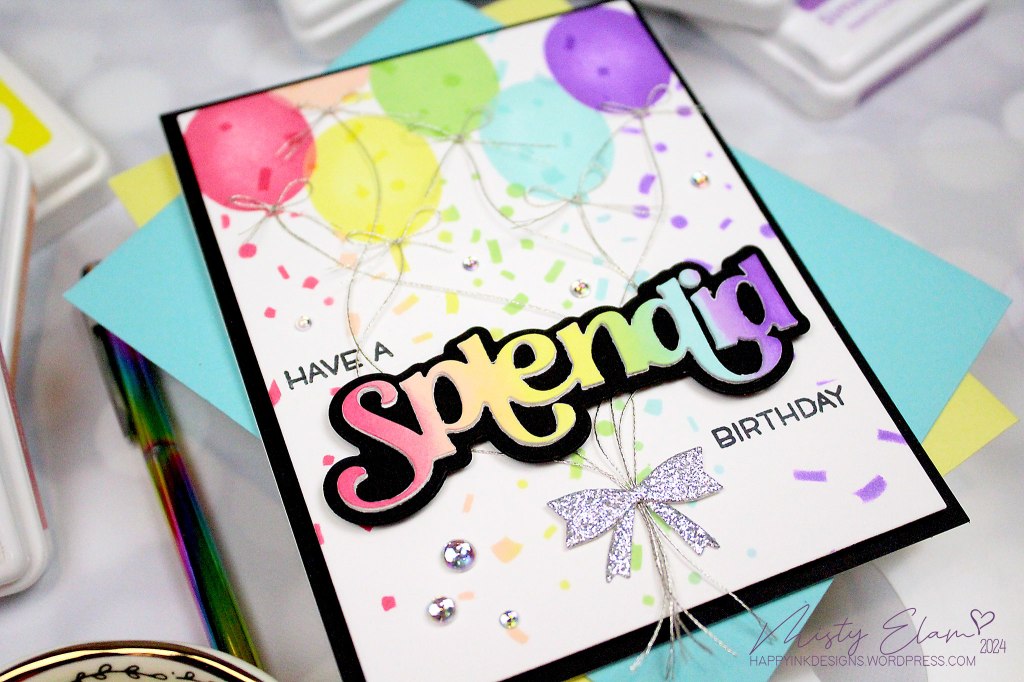
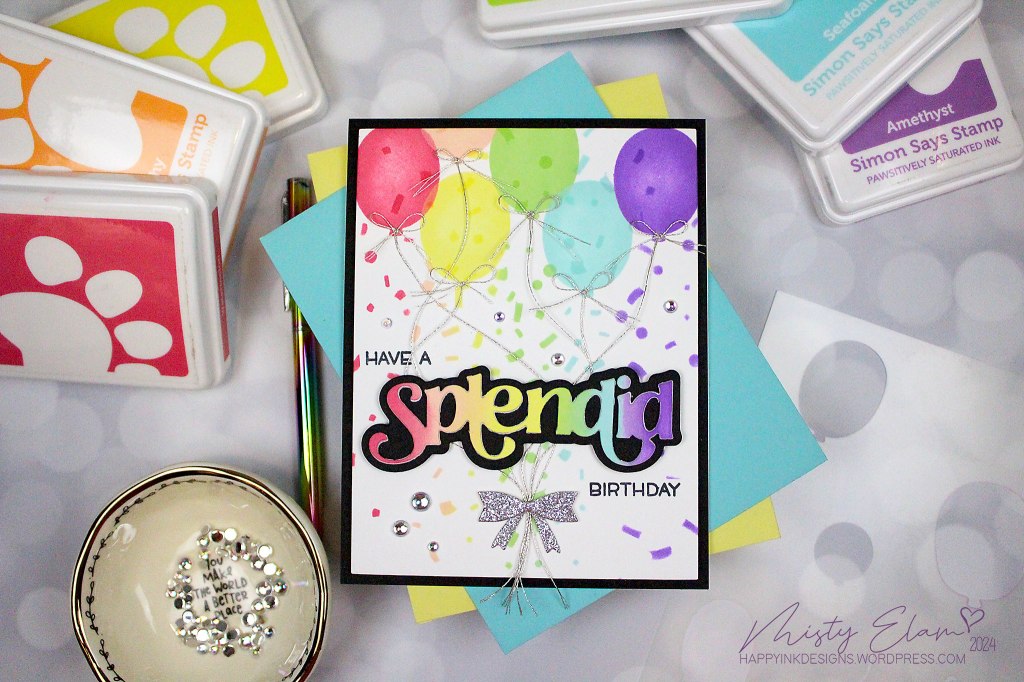
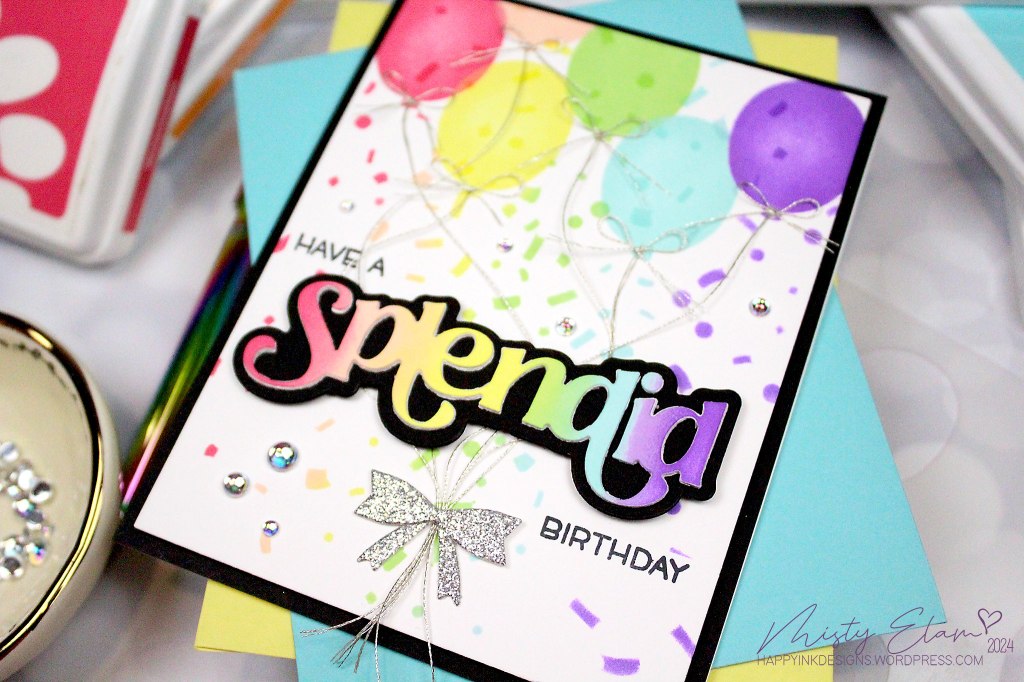
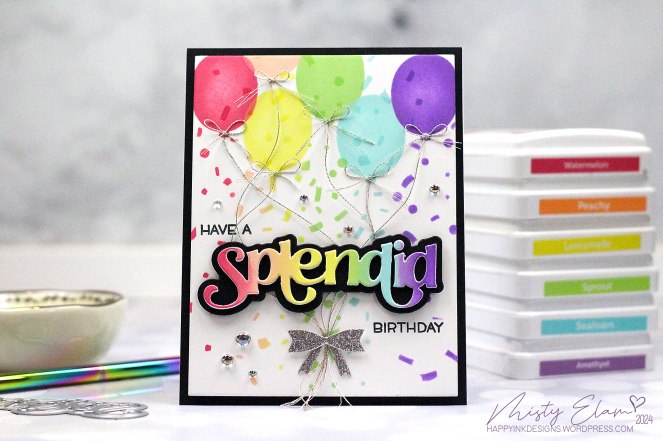
Hi there, friends! Thank you for stopping by and checking out my latest creation. Simon Says Stamp has a brand new release that is now LIVE. If you’d like to check out the entire release, click HERE. I used a brand new die to make this card. I used the Splendid die and I paired it with some of Simon’s best celebratory products.

Let’s start at the beginning. I started out with an A2 sized panel of Hammermill 100 lb. Card stock and I wanted to make this a fun and festive Birthday card so I pulled out my Party Balloons Stencil and I got to work. I stenciled these bright balloons using Simon’s Pawsitively Saturated Inks. Starting with Watermelon, then Peachy, Lemonade, Sprout, Seafoam and lastly Amethyst. These colors work so well together to form this gorgeous rainbow of festivity!!

The balloons are wonderful, but it still wasn’t enough excitement for me so I pulled out my Confetti Stencil and I stenciled the same colors in the same order.

Next, I die cut this fabulous new Splendid die out of Hammermill Card Stock and I cut it out 2 more times to add some dimension. I die cut the shadow die using Black Card Stock. I hadn’t had my fill of rainbow yet so I ink blended the same Pawsitively Saturated Inks on my Splendid die, I layered and adhered them all together and then I popped the Splendid up with some Black .08″ Foam Squares.

I used an old stamp set from my stash for the “Have a” and “Birthday” stamp. I thought this Silver Metallic Thread by DMC would look great attached to my balloons so I cut a thread to be the string and then I cut another piece to make these teeny tiny bows. Let me tell ya, that was no easy task!!

I loosely adhered the balloon strings together below my sentiment and I attached this adorable little bow that I had in my stash. I popped it up a touch using a mini glue dot.

I trimmed my balloon panel down to 4″x5.25″ and I attached it to an A2 sized panel of Black Card Stock. I attached all of that to a top folding card base. To finish off my project, I added a few Iridescent Color Drops and I had myself a winner! I wanted this card to be fun and festive because I made it for my Mom’s Birthday which was on the 19th. She’s my rock, my confidant, my best friend, my heart. I’m so very blessed to have her in my life each and every day and I will NEVER take that for granted. She’s the life of the party so I had to make a card to match her personality.

Please don’t forget to check out the new release from Simon Says Stamp. You can click HERE and I’ll take to right to it. Thanks again for stopping by and I’ll see you on Wednesday.

Follow Simon Says Stamp on Instagram

Cardmaking · Challenges · Design Team · Handmade Greeting Cards · Simon Says Stamp

My Favorite Peeps

Hello crafty friends!! It’s time for a brand new challenge at the Simon Says Stamp Wednesday Challenge.  This week the challenge is

We are showcasing Picket Fence Studios Products this week.  If you have any of these products, we’d love to see them used, but it’s certainly not a requirement to join the challenge. 

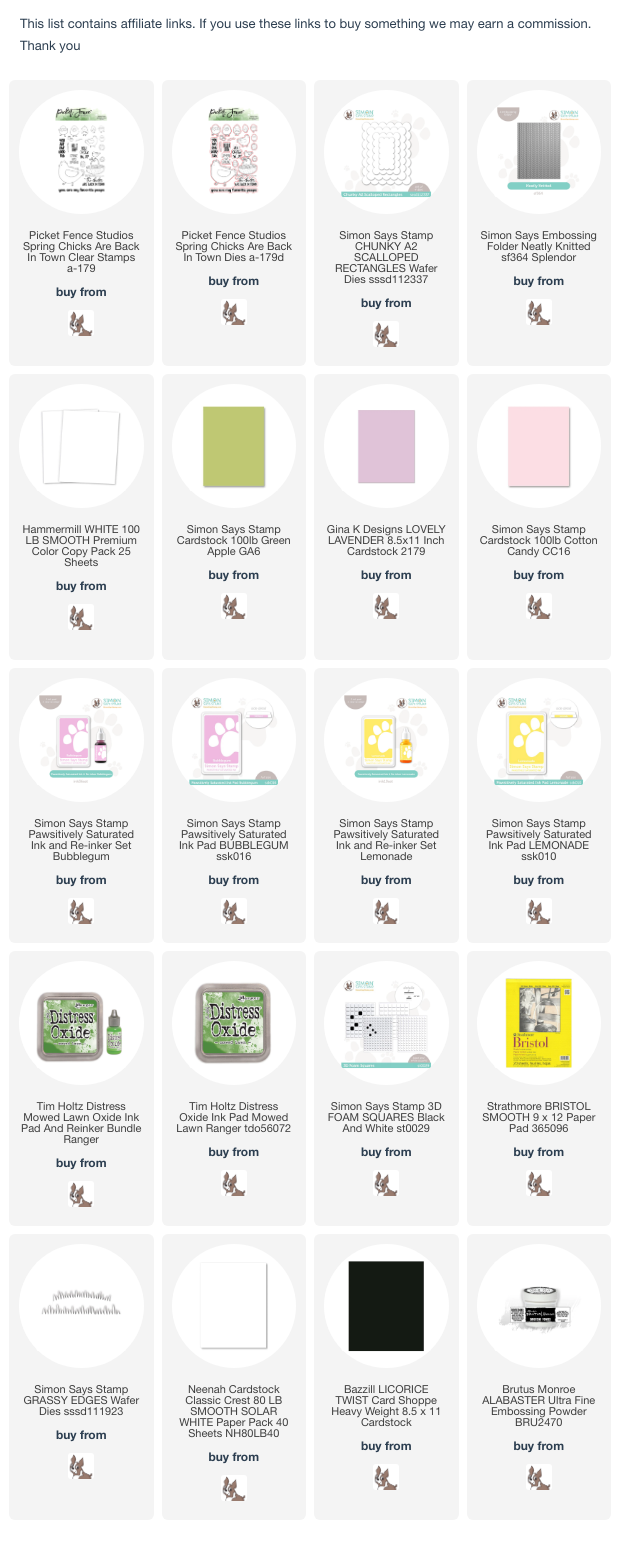
As always, the generous folks at Simon Says Stamp will be giving away a $25 voucher to one randomly selected winner to shop at the fabulous Simon Says Stamp Store.  You can enter 5 times which means you can make 5 different projects following this week’s prompt and have 5 chances to win a shopping spree!! Sounds like a win/win to me!! I’ve linked all of the supplies that I used at the end of this post. Compensated affiliate links used where possible at no cost to you.

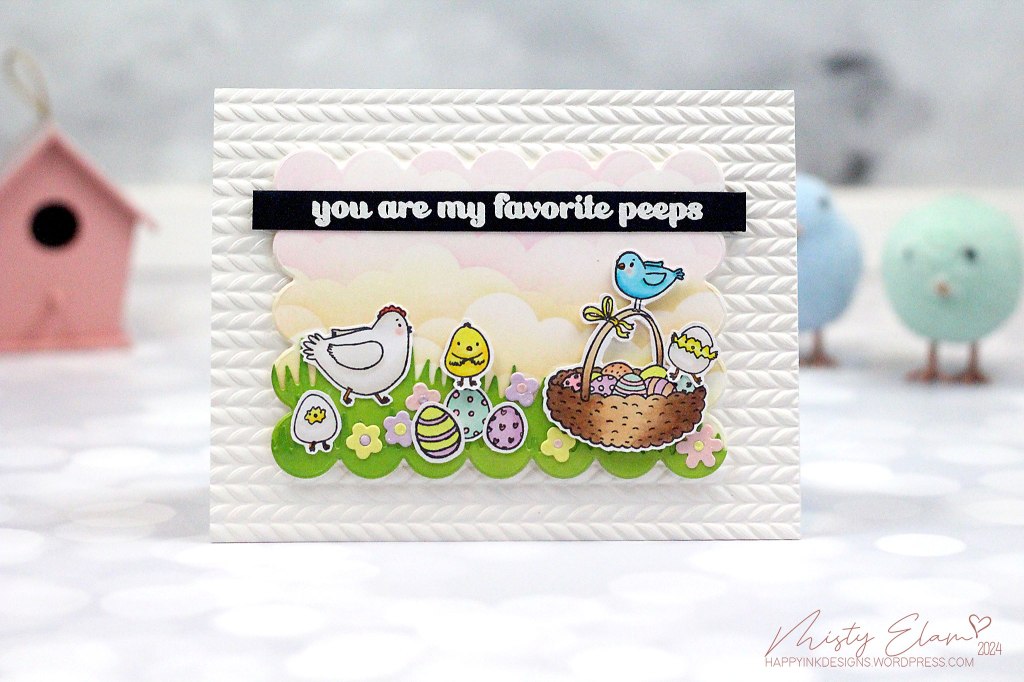
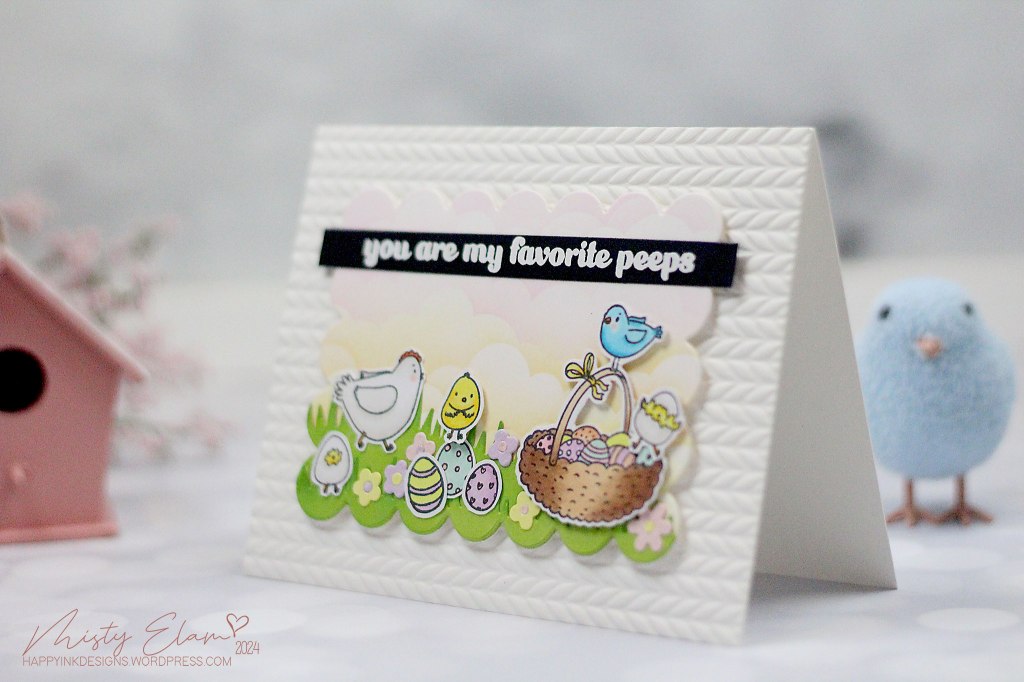
I started out with an A2 sized panel of Hammermill 100 lb. card stock. I surprisingly discovered that I really like this card stock for ink blending. I’ve always been a Bristol Smooth kinda gal, but then I decided to give the hammermill a try because I had it and I wasn’t using it for anything else and I really didn’t want it to go to waste so I thought, why not? I originally purchased it because I had heard other crafters say that it works really well with hot foil plates, but I just didn’t have that same kind of luck. Therefore, it was just sitting in my card stock organizer collecting dust. I do still love my Bristol Smooth card stock as well for ink blending though. The Hammermill is a brighter white than the Bristol so when making a card like this where there is quite a bit of white around my ink blending, I’ll choose the Hammermill. That will help me decide in future projects which route I choose.

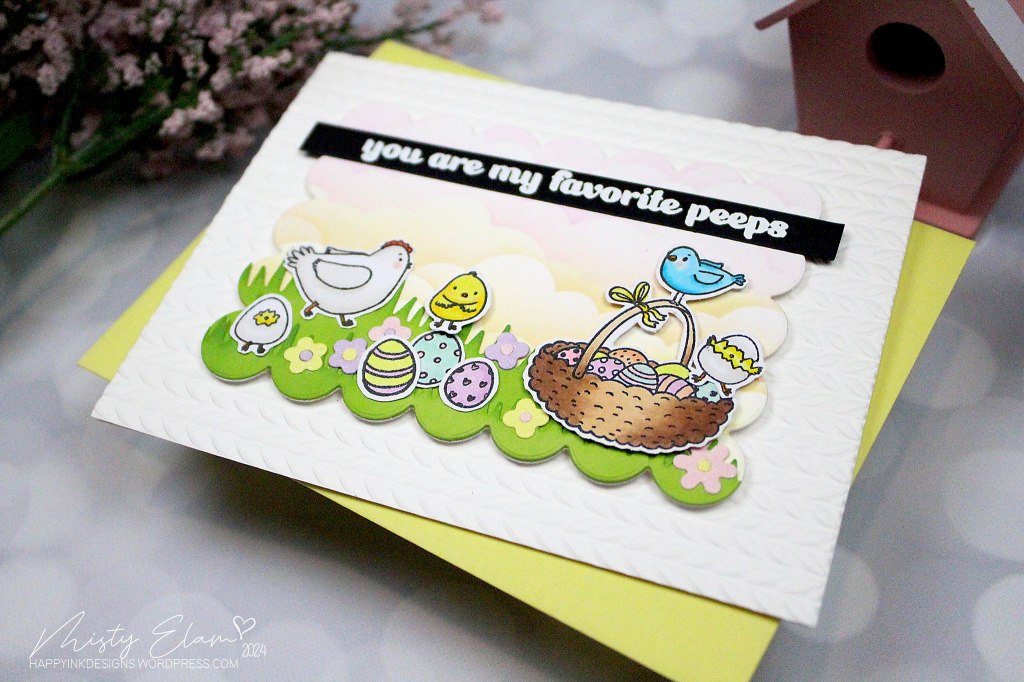
I ink blended Simon Says Stamp’s Bubblegum and Lemonade Pawsitively Saturated Inks with a cloud stencil from my stash and created these beautifully soft, fluffy clouds. For my grass, I used Green Apple Card Stock and I die cut it with the Grassy Edges die but then I went around the edges with some Mowed Lawn Distress Oxide ink just to give it a little depth.

I took my grass and clouds panel and I die cut this adorable scalloped rectangle with Simon’s Chunky A2 Scalloped Rectangles die. I set that aside and I started coloring my images. The stamp set I used here is called Spring Chicks Are Back in Town by Picket Fence Studios. I colored my images with my Copic Markers and I fussy cut each image. But there are coordinating dies to go with this stamp set.

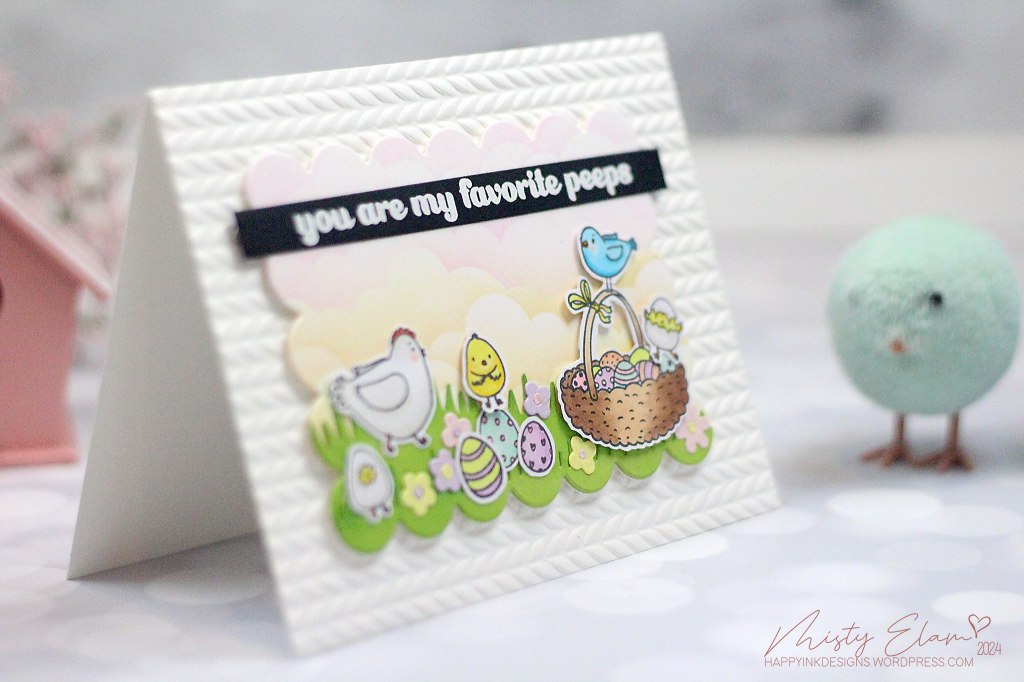
I popped my panel up with some craft foam and set it aside to finish my background panel. For my background, I used one of my new favorite embossing folders by Simon called Neatly Knitted. I ran a piece of A2 Neenah Classic Crest Solar White 80 lb. card stock through this embossing folder and then I attached it to a top folding, horizontal card base.

Next, I heat embossed my sentiment on a strip of Black Card Stock with Alabaster White embossing powder. I adhered my sentiment to my scalloped panel and then adhered the panel to my embossed background. To finish off my scene, I added a few tiny flowers from an old Simon die in pastel colors and added them here and there. I popped my basket up with some foam squares and called her done!

So now it’s YOUR turn. Happy Crafting!!    

Follow Simon Says Stamp on Instagram

  Do you use Instagram ?  If so please add  #ssswchallenge to your challenge entry uploads so we can see them on there too.

   You have until Wed  8am Ohio time. 1pm UK time, 2 pm CET to join in

Cardmaking · Challenges · Design Team · Handmade Greeting Cards · Simon Says Stamp

Kiss Me, I’m Irish

Hello crafty friends!! Happy (early) St. Patty’s Day!! It’s time for a brand new challenge at the Simon Says Stamp Wednesday Challenge.  This week the challenge is

We are showcasing Pretty Pink Posh Products this week.  If you have any of these products, we’d love to see them used, but it’s certainly not a requirement to join the challenge. 

As always, the generous folks at Simon Says Stamp will be giving away a $25 voucher to one randomly selected winner to shop at the fabulous Simon Says Stamp Store.  You can enter 5 times which means you can make 5 different projects following this week’s prompt and have 5 chances to win a shopping spree!! Sounds like a win/win to me!! I’ve linked all of the supplies that I used at the end of this post. Compensated affiliate links used where possible at no cost to you.

I almost forgot how much fun it is to play with alcohol inks!! Especially when you have no expectations. Which I’ve learned it the way to go, for me personally. I used to get frustrated because I had a different picture in my head of how my final outcome would look and it just never lined up for me. But now, if I go in with no expectations then I’m never disappointed! Hey, it works for me.

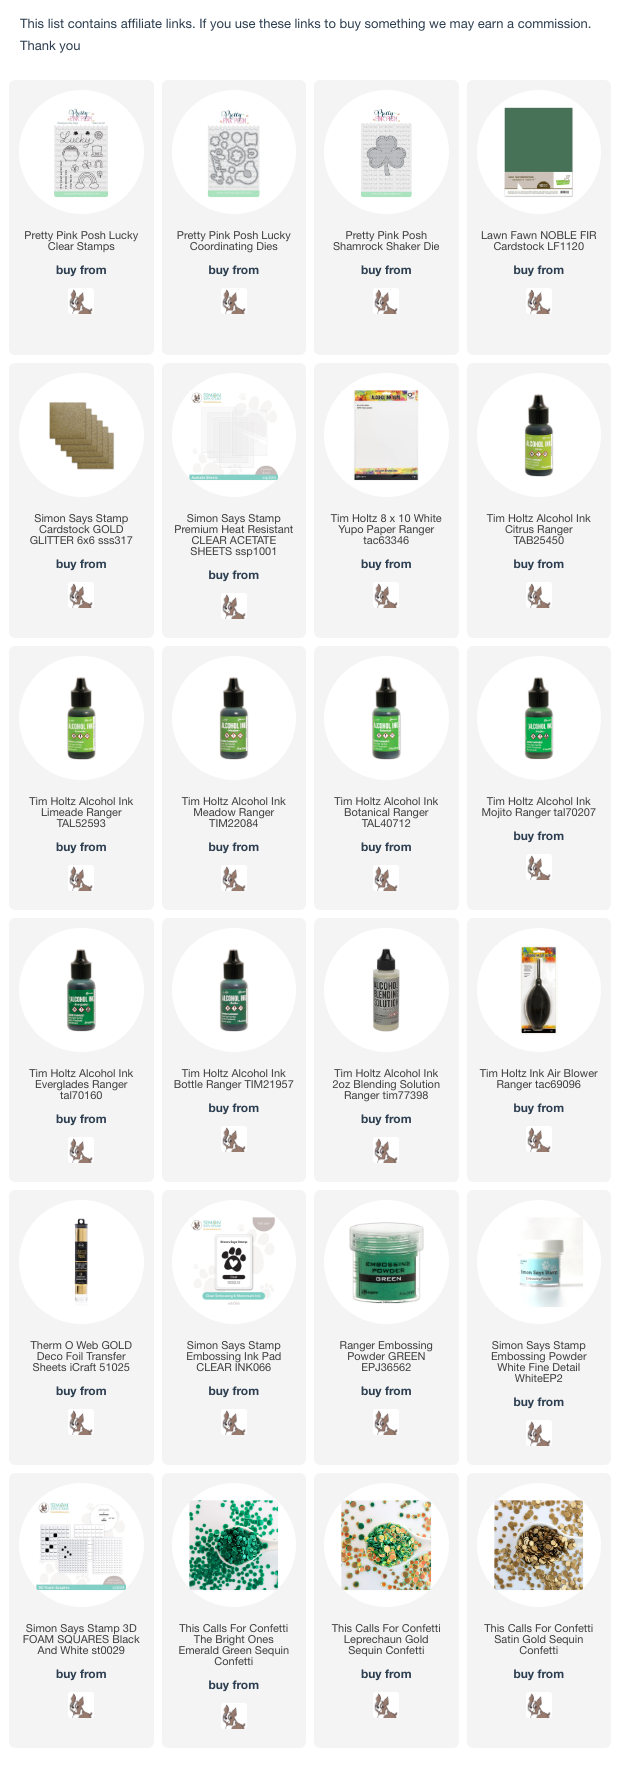
I used several different shades of green, which I’ve linked all of them below, and I just went to town. I left some areas white and on the darker sections while my ink was still a bit tacky, I added some gold foil by simply pressing the foil onto my panel and burnishing it a bit and then pulling the foil away. It left me with this gorgeous marble looking foil.

After my background was done, I used the Shamrock Shaker die by Pretty Pink Posh and some gold glitter cardstock to cut out this beautifully large shamrock. I decided to cut it out a couple more times using green card stock just to pop it up a bit off my background panel.

My sentiment is from Pretty Pink Posh’s stamp set called Lucky. I heat embossed it with green embossing powder and then I used the coordinating dies to cut out the Lucky and two additional layers to add some dimension.

The sub-sentiment is also from the Lucky stamp set and I heat embossed this part on green card stock with white embossing powder. I popped it up using some foam squares. I didn’t feel like this card needed any additional embellishments so I simply rounded the lower left corner and I attached it to a top folding card base.

I thought it would be fun to make an additional card but this time turning the shamrock into a shaker card since that is the name of this die, Shamrock Shaker die.

I made this one exactly the same, except I added the shaker element.

Ok, this is so cool. As I’m sitting here in my craft room typing this blog post, I stopped to look out my window because I saw that the sun was finally starting to shine today (it’s been raining all day) and right outside my window is this BEAUTIFUL rainbow!!! Fitting for the post I’m writing. I only wish I could photograph it, but they never quite look as magical in picture as they do in real life. But I still wanted to share that with you. Thank you so much for stopping by today. Have a great day!

So now it’s YOUR turn. Happy Crafting!!    

Follow Simon Says Stamp on Instagram

  Do you use Instagram ?  If so please add  #ssswchallenge to your challenge entry uploads so we can see them on there too.

   You have until Wed  8am Ohio time. 1pm UK time, 2 pm CET to join in

Cardmaking · Challenges · Design Team · Handmade Greeting Cards · Simon Says Stamp

Marital Bliss

Hello crafty friends!! It’s time for a brand new challenge at the Simon Says Stamp Wednesday Challenge.  This week the challenge is

We are showcasing CZ Design Products this week.  If you have any of these products, we’d love to see them used, but it’s certainly not a requirement to join the challenge. 

As always, the generous folks at Simon Says Stamp will be giving away a $25 voucher to one randomly selected winner to shop at the fabulous Simon Says Stamp Store.  You can enter 5 times which means you can make 5 different projects following this week’s prompt and have 5 chances to win a shopping spree!! Sounds like a win/win to me!! I’ve linked all of the supplies that I used at the end of this post. Compensated affiliate links used where possible at no cost to you.

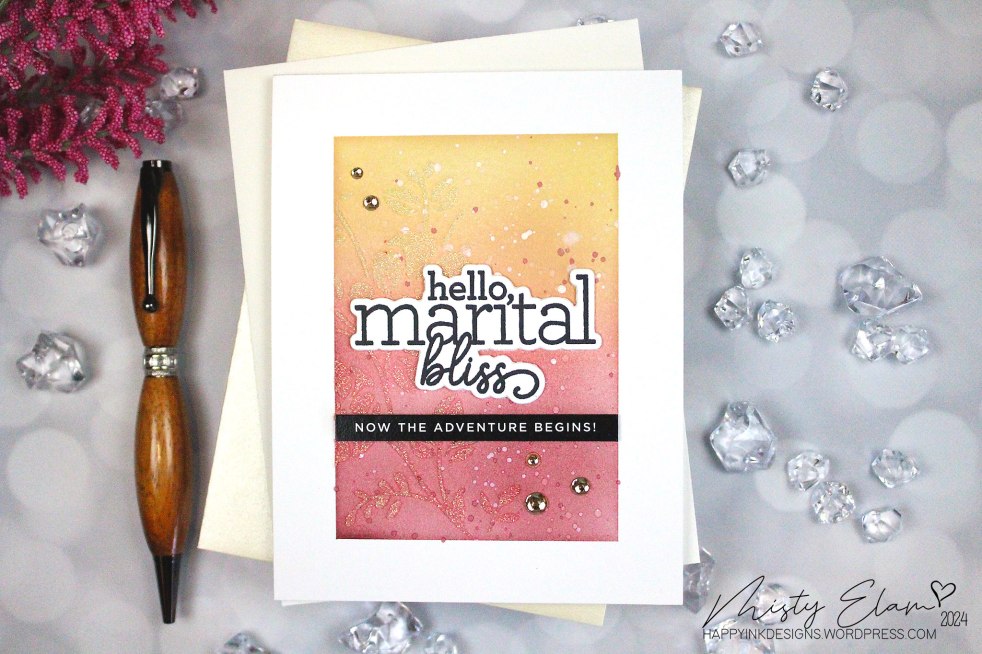
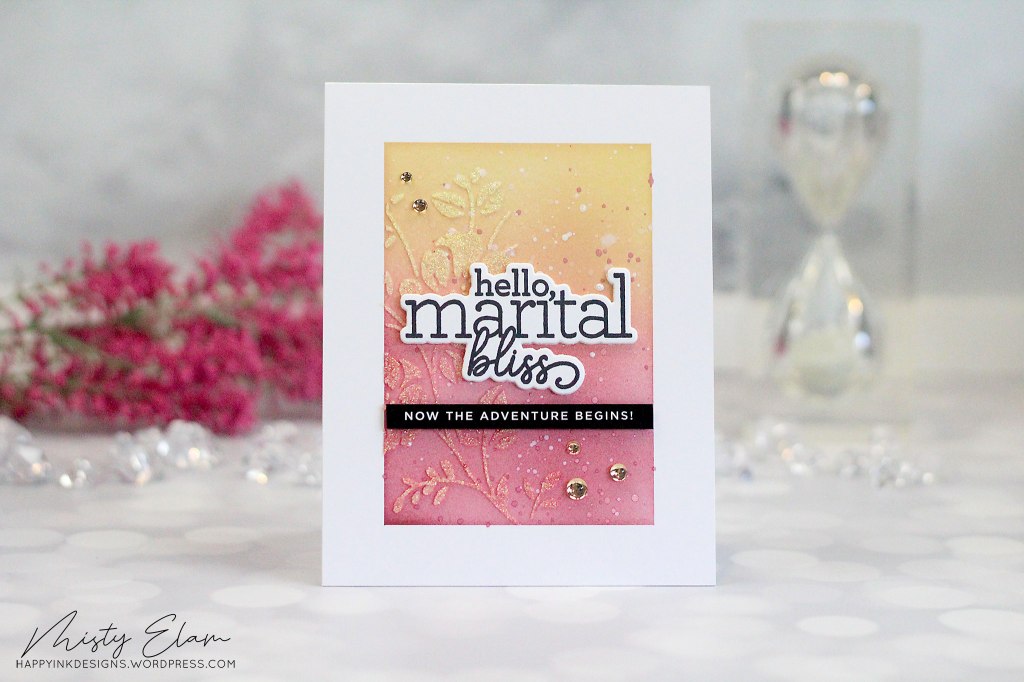
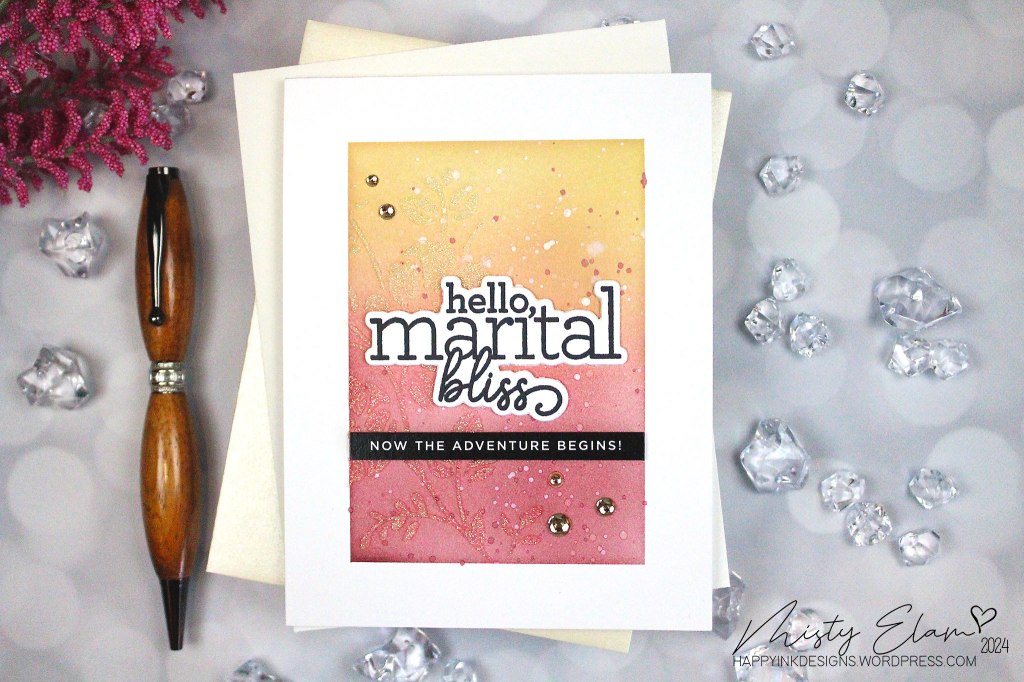
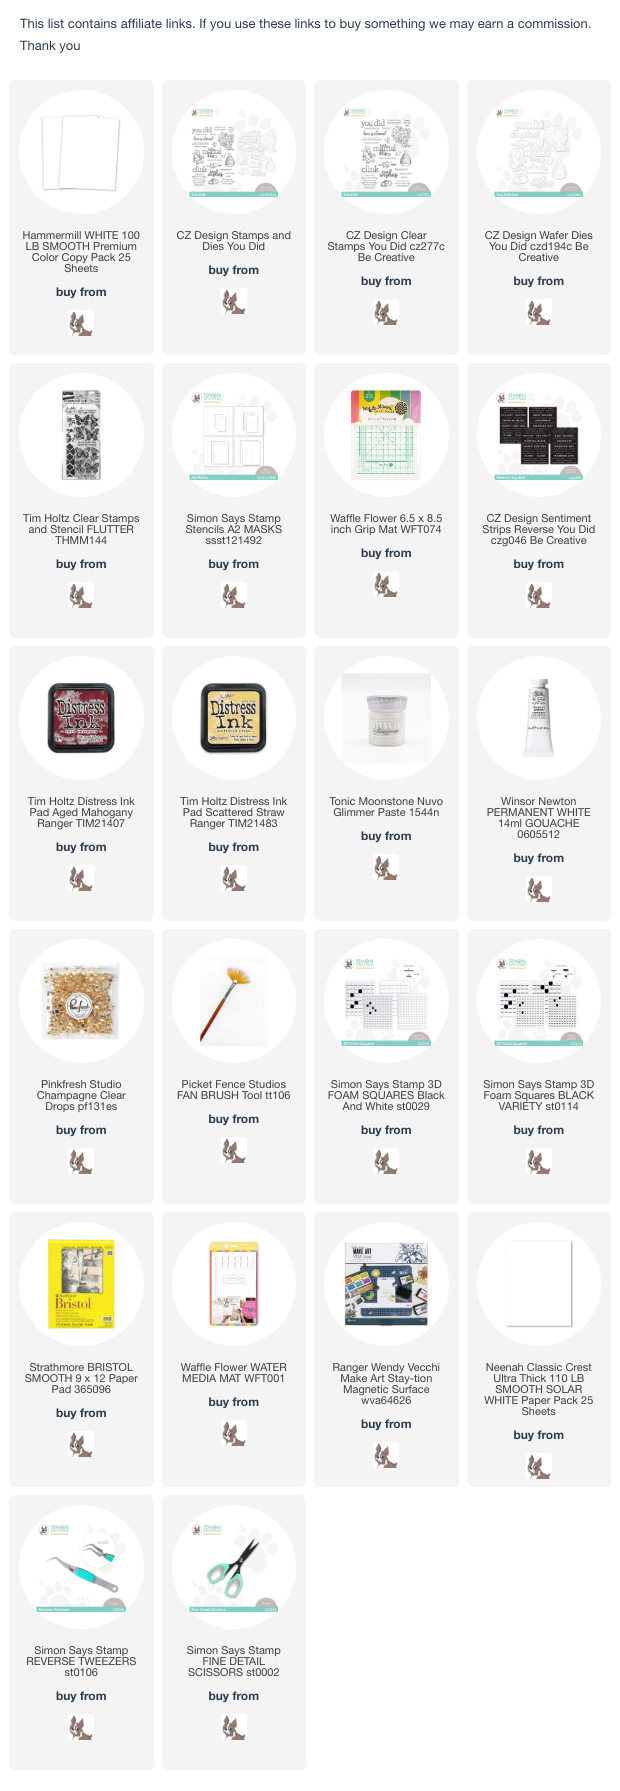
Nobody does sentiments quite like Cathy Zielske!! I took advantage of a recent sale Simon Says Stamp had going on where everything from CZ Designs was 20% off!! I purchased this stamp set called You Did along with the coordinating dies which is where the sentiment is from. I also purchased the coordinating Reverse Sentiment Strips, also called You Did which is where I got the sub-sentiment.

Let’s back up a bit. I started out creating my background using Simon’s A2 Masks stencil. I did this on the Waffle Flower Grip Mat (which I’ll come back to) using an A2 size piece of Hammermill 100 lb. Smooth White Card Stock. I usually ALWAYS ink blend on Bristol Smooth card stock, but I saw someone on social media somewhere say that the Hammermill was also a great paper to ink blend on so since I already owned some, I decided to give it a try. I really didn’t think I was going to love it as much as I do!! It’s a brighter white than the Bristol Smooth which was the tipping point for me. Especially for a wedding card.

Ok, back to the Waffle Flower Grip Mat. Yes, I just like everyone else who is a cardmaker/crafter watched Jennifer McGuire’s awesome video called 2023 Crafty Gift Guide on YouTube. I was intrigued by this grip mat because stenciling is something I’m always trying to improve my technique on. I’ve gone from painter’s tape to the Water Media Mat to the Make Art STAY-tion and now to the grip mat. All of them work great and each have their own benefits but I really enjoy this grip mat because I can use it in or out of my Misti and I can use it for multiple techniques like ink blending, stamping and of course, stenciling. It also comes with a printed guide which is helpful. I use a white glass mat so this grip mat sticks to my glass mat and I can see the guides very clearly. If you haven’t seen Jennifer’s video, I highly recommend you watch it, she goes over all the great features and benefits of using this grip mat.

Now, back to my process. I stenciled and ink blended my background using Scattered Straw and Aged Mahogany distress inks. Then I used another stencil called Flutter by Tim Holtz and Stamper Anonymous and I stenciled this beautiful floral arrangement over the top of my background using Nuvo Glimmer Paste in Moonstone.

I splattered the same colors using a fan brush and I added some White Gouache as well. I stamped and die cut my sentiment and then I die cut two additional layers to add dimension to my sentiment. I popped my sub-sentiment up using Black Foam Squares.

To finish off my design, I added a few Clear Drops in Champagne and then I added everything to a top folding card base.

So now it’s YOUR turn. Happy Crafting!!    

Follow Simon Says Stamp on Instagram

  Do you use Instagram ?  If so please add  #ssswchallenge to your challenge entry uploads so we can see them on there too.

   You have until Wed  8am Ohio time. 1pm UK time, 2 pm CET to join in

Cardmaking · Challenges · Design Team · Handmade Greeting Cards · Simon Says Stamp

Scripty Birthday

Hello again!! It’s time for a brand new challenge at the Simon Says Stamp Wednesday Challenge.  This week the challenge is

We are showcasing Spellbinders Products this week.  If you have any of these products, we’d love to see them used, but it’s certainly not a requirement to join the challenge. 

As always, the generous folks at Simon Says Stamp will be giving away a $25 voucher to one randomly selected winner to shop at the fabulous Simon Says Stamp Store.  You can enter 5 times which means you can make 5 different projects following this week’s prompt and have 5 chances to win a shopping spree!! Sounds like a win/win to me!! I’ve linked all of the supplies that I used at the end of this post. Compensated affiliate links used where possible at no cost to you.

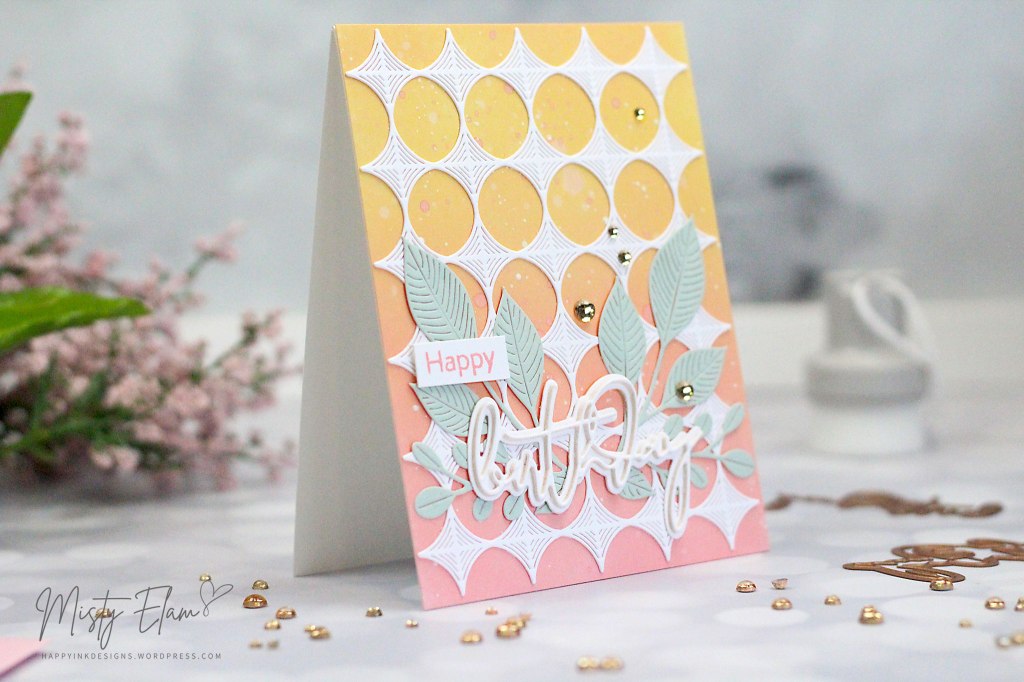
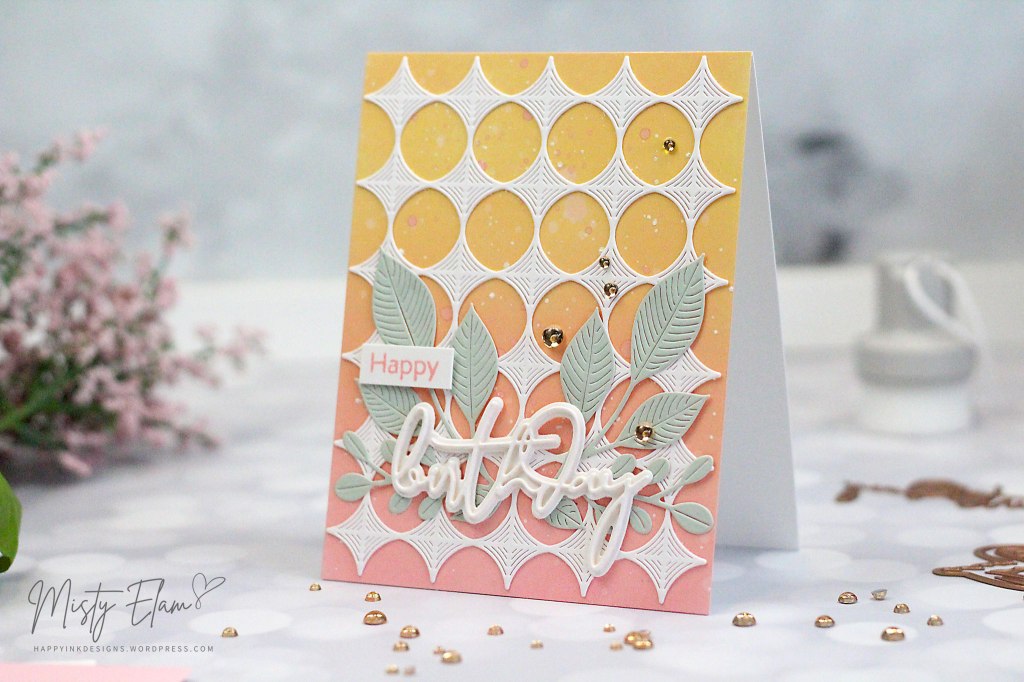
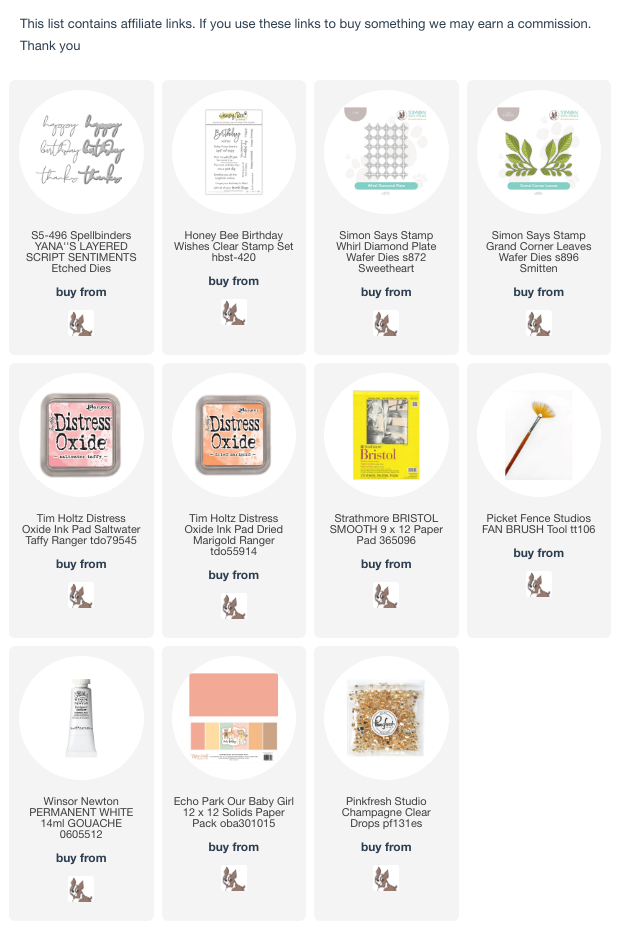
I started out with a piece of A2 sized Bristol Smooth Card Stock and I ink blended one of my favorite color combinations which is Dried Marigold and Saltwater Taffy Distress Oxide Inks. I used those same colors with a fan brush to splatter some color onto my background. I added a little White Gouache to the splatter as well.

To layer over the top of my ink blended background, I die cut the Whirl Diamond Plate die out of white card stock and I love how beautiful it looks against my background.

I die cut the Grand Corner Leaves die using this lovely paper pack by Echo Park called Our Baby Girl to give my sentiment it’s own backdrop and then I moved onto the sentiment.

I stamped the Happy on a scrap piece of white card stock using the Saltwater Taffy D.O. ink and I trimmed it down to the size I wanted. The Birthday die is from Spellbinders and it’s called Yana’s Layered Script Sentiments die. I LOVE these dies. It comes with a “Happy” and a “Thanks” scripty die as well, plus they each have a shadow die. And they do layer quite nicely. I kept the “Birthday” sentiment in white. It really was the best option.

To finish off my card, I added a few Champagne Clear Drops and it was exactly what my card needed.

So now it’s YOUR turn. Happy Crafting!!    

Follow Simon Says Stamp on Instagram

  Do you use Instagram ?  If so please add  #ssswchallenge to your challenge entry uploads so we can see them on there too.

   You have until Wed  8am Ohio time. 1pm UK time, 2 pm CET to join in

Cardmaking · Challenges · Design Team · Simon Says Stamp

Rainbow Flowers

Hello again!! It’s time for a brand new challenge at the Simon Says Stamp Wednesday Challenge.  This week the challenge is

Beautiful Blooms

We are showcasing Paper Rose Products this week.  If you have any of these products, we’d love to see them used, but it’s certainly not a requirement to join the challenge. 

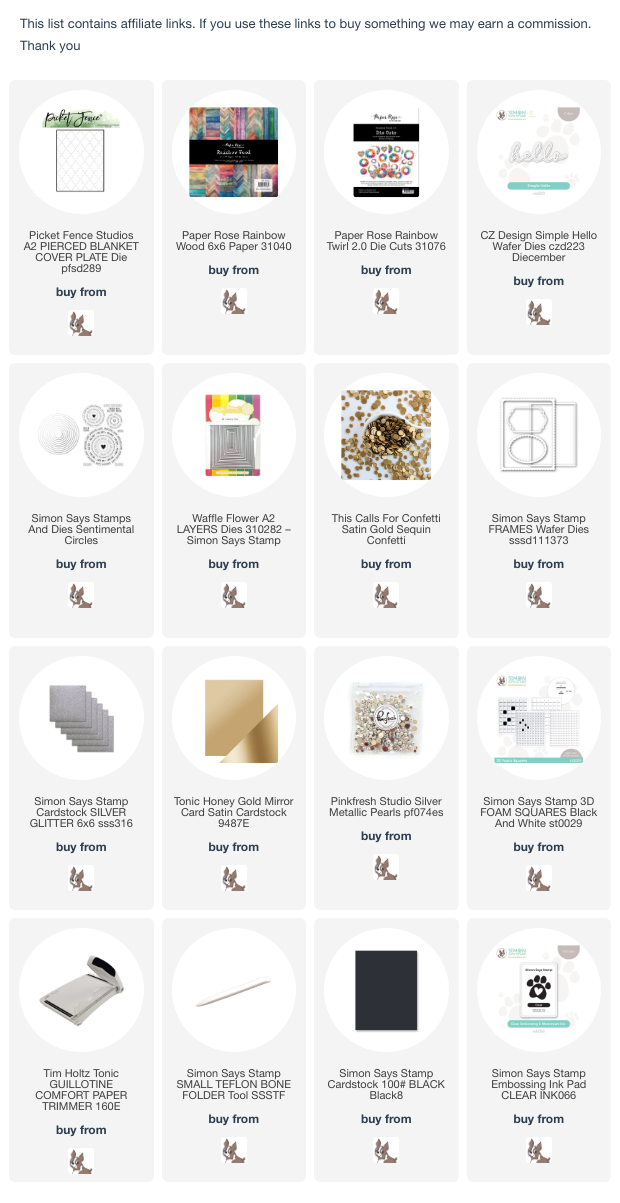
As always, the generous folks at Simon Says Stamp will be giving away a $25 voucher to one randomly selected winner to shop at the fabulous Simon Says Stamp Store.  You can enter 5 times which means you can make 5 different projects following this week’s prompt and have 5 chances to win a shopping spree!! Sounds like a win/win to me!! I’ve linked all of the supplies that I used at the end of this post. Compensated affiliate links used where possible at no cost to you.

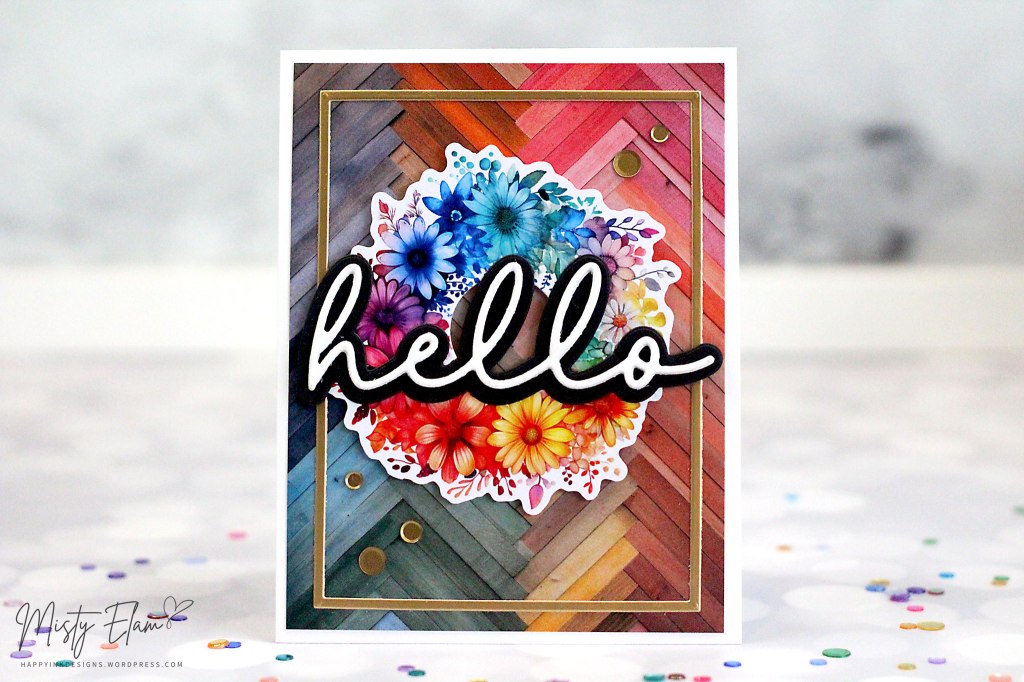
The products I used to make these two cards made it sooooo easy and quick to pull these together. The “Beautiful Blooms” are from Paper Rose and they’re called Rainbow Twirl 2.0 Die Cuts.

I’ve never used pop out die cuts like this before and they were just so beautiful that I thought this was the perfect opportunity to give them a try!

The package includes 4 A5 sheets of pop out dies so there are many to choose from. Twenty six to be exact, I counted. But they’re all in these gorgeous rainbow colors. Some are wreaths, some are circle (like my 2nd card) and there are even a few heart shaped cut outs.
I popped out the floral die cut and used a small circle die to cut out the center. I paired this gorgeous bouquet with some patterned paper also by Paper Rose called Rainbow Wood. These two products go very well together. I trimmed the patterned paper down to 4″ x 5.25″ so that I would have a slight white border going all the way around.

I used the Simple Hello die from CZ Design for my sentiment. I die cut 3 layers of the smaller die and glued them together to add some dimension to my card. I cut the shadow die out of Black Card Stock and adhered that to the smaller die. That wasn’t enough dimension for me so I also popped the bouquet up with some Foam Squares.

To finish this card off, I added a gold frame using 2 of the A2 Layers Dies from Waffle Flower and I matched that with a couple Satin Gold Sequins. Popped everything onto a top folding card base and card #1 was complete. I think it took me about half hour to make this card.
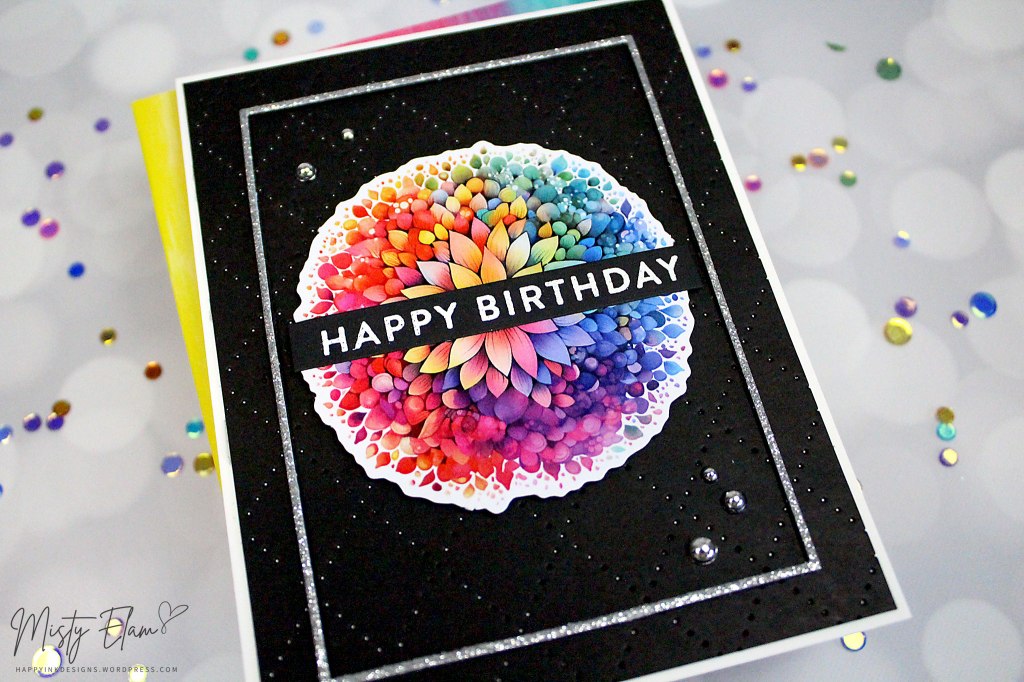
Now, for my 2nd card I used one of the circle pop out die cuts. The colors are just so vibrant, I love it!

Let’s start off with the background. I used this gorgeous Pierced Blanket Cover Plate Die by Picket Fence and I die cut it using Black Card Stock. I trimmed this down a bit to give me a white border.
I attached the background to a top folding card base and then added the floral circle. I used foam squares again to pop the bouquet up some. I had a Happy Birthday strip that I heat embossed awhile back in my stash and I can’t for the life of me remember which stamp set it came from. It’s one of those things that are going to drive me nuts until I figure it out though. I glued my sentiment across the front of the bouquet.

I liked the gold trim from my previous card so much that I decided to do it again for this card. Except I wanted it to be thinner so I used the Frames die from Simon with some silver glitter card stock. I die cut this out 2 additional times with white card stock to pop it up and make it look more like a frame.

Lastly, I added a few Silver Metallic Pearls.

So now it’s YOUR turn. Happy Crafting!!    

Follow Simon Says Stamp on Instagram

  Do you use Instagram ?  If so please add  #ssswchallenge to your challenge entry uploads so we can see them on there too.