Cardmaking · Challenges · Design Team · Handmade Greeting Cards · Simon Says Stamp · You Tube

Lemon Zest

Hello crafty friends!! Please join me for a new challenge at the Simon Says Stamp Wednesday Challenge.  This week the challenge is

Stamp It

We are showcasing CZ Design Products this week.  If you have any of these products, we’d love to see them used, but it’s certainly not a requirement to join the challenge. 

As always, the generous folks at Simon Says Stamp will be giving away a $25 voucher to one randomly selected winner to shop at the fabulous Simon Says Stamp Store.  You can enter 5 times which means you can make 5 different projects following this week’s prompt and have 5 chances to win a shopping spree!! Sounds like a win/win to me!! I’ve linked all of the supplies that I used at the end of this post. Compensated affiliate links used where possible at no cost to you.

If this card doesn’t make you feel better overall, then I don’t know what will. It’s just so… happy and bright and cheerful. I love it. Fun fact, the lemon blossom is said to be “the happiest smell in the world”. I believe it!!

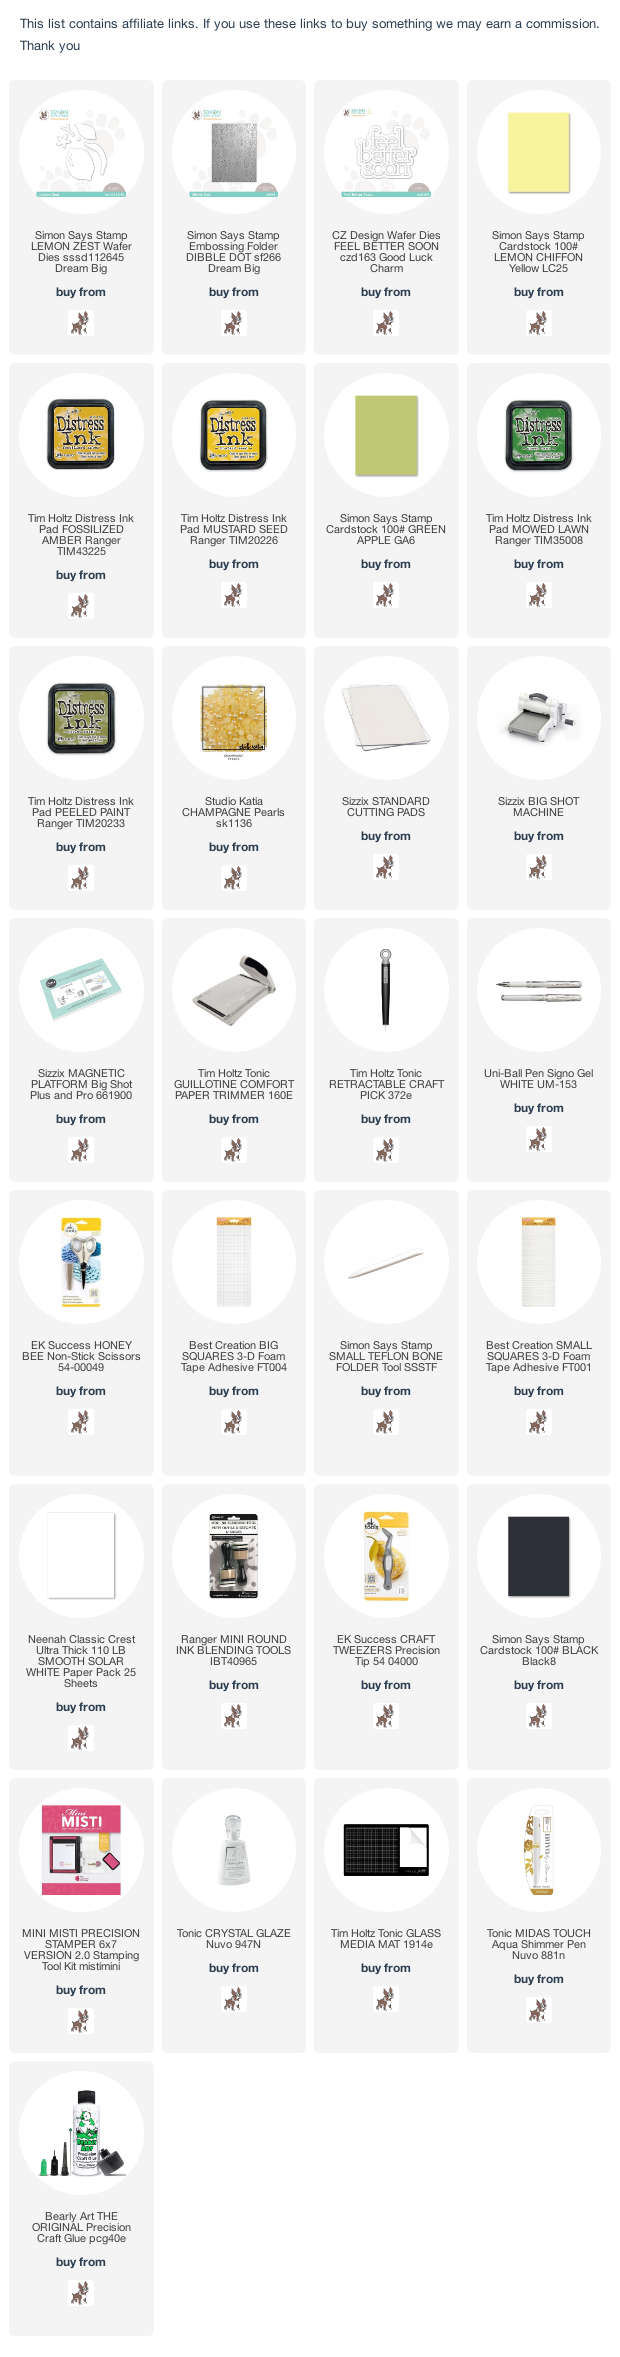
This was super easy and fast to make so let’s get to it. I started out with a piece of A2 sized Lemon Chiffon card stock and I ran it through my new favorite embossing folder which is Dibble Dot by Simon Says Stamp. I distressed the edges with Mustard Seed and Fossilized Amber distress inks. I trimmed my panel down to 4″ x 5.25″ and set it aside.

I couldn’t wait to use this Lemon Zest die so I cut it out using Lemon Chiffon card stock, Green Apple card stock and Neenah Solar White 110 lb. card stock. I did the same thing to my lemon, I distressed the edges with Mustard Seed and Fossilized Amber distress inks. For the leaves I used Mowed Lawn and Peeled Paint.

I cut the lemon blossom and the stem from white card stock and used my copic markers to color them the color I wanted. I glued all the pieces together and I popped it up using foam squares to add dimension. With a background like that, how could I NOT add dimension?

For my sentiment I used the Feel Better Soon die by CZ Design. I cut the white layer out three times and glued them together for a little extra dimension.

I attached my card front to a black background and glued everything to a side folding card base. I added a few Champagne Pearls by Studio Katia and my card was complete!

So now it’s YOUR turn. Happy Crafting!!    

Follow Simon Says Stamp on Instagram

  Do you use Instagram ?  If so please add  #ssswchallenge to your challenge entry uploads so we can see them on there too.

   You have until Wed  8am Ohio time. 1pm UK time, 2 pm CET to join in

Cardmaking · Challenges · Design Team · Handmade Greeting Cards · Simon Says Stamp · You Tube

Shimmer and Shine

Hello crafty friends!! Please join me for a new challenge at the Simon Says Stamp Wednesday Challenge.  This week the challenge is

Shimmer and Shine

We are showcasing Gina K Designs Products this week.  If you have any of these products, we’d love to see them used, but it’s certainly not a requirement to join the challenge. 

As always, the generous folks at Simon Says Stamp will be giving away a $25 voucher to one randomly selected winner to shop at the fabulous Simon Says Stamp Store.  You can enter 5 times which means you can make 5 different projects following this week’s prompt and have 5 chances to win a shopping spree!! Sounds like a win/win to me!! I’ve linked all of the supplies that I used at the end of this post. Compensated affiliate links used where possible at no cost to you.


This card was so much fun to make. And it was so easy!! It was my first time trying the adhesive transfers and I gotta say I am in love! These are so sparkly and so shiny and so fun to play with. Let’s get started.

I started out making my background first. I had these scraps left over from another project and I absolutely LOVED the colors so I thought they would make an awesome background. The colors I used are just card stock from my stash but I found colors that are available at Simon Says Stamp that are as close to the colors I used as possible. I cut all 5 colors down to 1/4″ wide strips and starting with a 110 lb. piece of Neenah card stock, I started gluing the strips in rainbow order.

As you can see, I paid no attention to which direction my card stock was facing when I put the adhesive transfers on it so the rainbow order is backwards, but that’s ok! Would you have noticed if I hadn’t pointed it out?

I chose which transfers I wanted to use while I warmed up my minc machine but I wasn’t even sure if it would turn out since my background was not smooth. It had all the creases from each strip of card stock so I was wondering if it would look good or if it would have dropped the foil on each strip of rainbow. Does that make sense?

There’s two different ways you can use these transfers, with or without heat. You can either use a laminator (or a minc machine like I used) or you can transfer the foil using your die cutting machine. I cut the images out that I wanted to use and I removed the back layer to expose the adhesive. I lightly pressed them on my background and then I put the background inside my transfer folder and ran it through my minc for the first time.

I removed the top protective sheet now to expose the adhesive that the foil will stick to and I cut my foil down to just cover the image. I placed the foil over my image and again I lightly pressed it onto my card stock.

I ran it through my minc machine again and then I burnished it a bit just because I didn’t quit know what to expect. And this is where it gets down right magical. When I removed that foil, it was love at first sight!! I was so happy with how this turned out, I even used it on the inside of the card. I added a few Metallic Silver Jewels by Pretty Pink Posh and attached it to a top folding card base and I was done.

So now it’s YOUR turn. Happy Crafting!!    

Follow Simon Says Stamp on Instagram

  Do you use Instagram ?  If so please add  #ssswchallenge to your challenge entry uploads so we can see them on there too.

   You have until Wed  8am Ohio time. 1pm UK time, 2 pm CET to join in

Cardmaking · Challenges · Design Team · Handmade Greeting Cards · Simon Says Stamp · You Tube

Fishing You a Happy Birthday

Hello crafty friends!! Please join me for a new challenge at the Simon Says Stamp Wednesday Challenge.  This week the challenge is

Summertime Blues

We are showcasing My Favorite Things Products this week.  If you have any of these products, we’d love to see them used, but it’s certainly not a requirement to join the challenge. 

As always, the generous folks at Simon Says Stamp will be giving away a $25 voucher to one randomly selected winner to shop at the fabulous Simon Says Stamp Store.  You can enter 5 times which means you can make 5 different projects following this week’s prompt and have 5 chances to win a shopping spree!! Sounds like a win/win to me!! I’ve linked all of the supplies that I used at the end of this post. Compensated affiliate links used where possible at no cost to you.

  I definitely have the summertime blues. My son goes back to school next Wednesday and it feels like summer just started!! When I was in school, we didn’t go back until after Labor Day and I liked it that way. I know they get more week long breaks during the year so it does balance out, but it sure feels like I blinked and summer was over. Anyway, let’s get to it. I created the background first for this card because I wasn’t quite sure if I was going to like it or not and I knew it was going to have to be set aside to dry. I used several alcohol inks in blues and greens and aquas on Yupo paper. I’ve listed them all below in my products used list.

I set my background aside to dry and then I started coloring all of these adorable images from MFT’s Reel-y Great Day stamp set with my copic markers. I stamped them on X-Press It Copic Blending Card with Memento Tuxedo Black Ink.

I used Neenah Desert Storm 110 lb. card stock for the background and then I cut my alcohol inked background with an old Avery Elle die which is no longer available but a very close second is the border dies from Lawn Fawn’s Simple Stitched Hillside Borders die. I glued the yupo paper to the top of my desert storm card stock using my favorite Bearly Art Craft Glue.

I took a couple different brown copic markers and I peppered the desert storm card stock to try and make it resemble sand or gravel. Then I decide to take a little white gouache and a makeup sponge and try and make the waters edge look foamy. Like you’d see at the ocean’s edge. I like the way it turned out, I only wish I would’ve added another layer once it was dry. Next time. I popped a couple of my colored images up with adhesive squares (large and small) and then I started gluing everything in place.

For my sentiment I took another piece of desert storm card stock and I white heat embossed it. I cut it out using an old MFT fishtail banner die. I attached my card panel onto a top folding card base.

So now it’s YOUR turn. Happy Crafting!!    

Follow Simon Says Stamp on Instagram

  Do you use Instagram ?  If so please add  #ssswchallenge to your challenge entry uploads so we can see them on there too.

   You have until Wed  8am Ohio time. 1pm UK time, 2 pm CET to join in

Cardmaking · Challenges · Design Team · Handmade Greeting Cards · Simon Says Stamp · You Tube

Die-Cember is Here

Hello crafty friends!! Please join me for a new challenge at the Simon Says Stamp Wednesday Challenge.  This week the challenge is

Fun With a Die

DieCember® is a very special month in the Simon Says Stamp calendar and this week we are showcasing some of the new release of DieCember® Craft Dies and previous release dies! If you have any Simon Says Stamp Dies we would love to see them used. You can view the entire new release by clicking any of my links above or just scroll down to the bottom of this post.

As always, the generous folks at Simon Says Stamp will be giving away a $25 voucher to one randomly selected winner to shop at the fabulous Simon Says Stamp Store.  You can enter 5 times which means you can make 5 different projects following this week’s prompt and have 5 chances to win a shopping spree!! Sounds like a win/win to me!! I’ve linked all of the supplies that I used at the end of this post. Compensated affiliate links used where possible at no cost to you.

I made several cards using this new Hello die by Simon Says Stamp and CZ Design. It’s always good to have a card or two on hand just to send someone to say hello and I really like this new hello die with a matching shadow die. Plus I had my stencils out anyway so I had a little fun with it.

I used Nuvo Glacier Paste in Sea Sprite for the first three cards. I had never used this paste before and I LOVE it!! It’s so pretty and shiny. I took a piece of Midnight Green card stock and my Tumbling Leaves Stencil and created this beautiful background. Next I cut the top layer of the hello die out three times and stacked them together to get a little dimension. I used another piece of that midnight green card stock for the shadow die. I cut my card front out using a Nesting Rounded Rectangle Infinity die by Hero Arts and attached it all to a top folding card base.

I repeated my background on a piece of Onyx Black Pearlescent card stock by Tonic Studios. For the sentiment, I used my Mini Minc Machine to foil that top layer. I cut an additional two layers out of plain black card stock to get that dimension. I attached everything to a top folding black card base.

For my next card, I thought I’d change up the stencil so I used the Geometric Arcs stencil by Simon Says Stamp.

Everything else was the same except I used plain black card stock as the background.

Look how beautiful that shine is!! The Nuvo Glacier Paste and the sage colored foil go very well together.

For my last card I wanted to try out some texture paste so I mixed a little Speckled Egg Distress Paint and some Crackle Distress Texture Paste and created this fun background.

I used the In the Round Stencil and sat back in amazement as this dried. I just think it’s so cool how that crackle paste works!! It looks awesome!! I used a SSS circle die to cut out just a portion because I wanted to keep this super simple. I used a Lawn Fawn Stitched Rectangle die and a piece of 110 lb. Neenah Solar White card stock to cut out my background layer and attached it to a side folding card base. I also popped the circle up on some craft foam so I had to attached a few black foam squares to the bottom of the sentiment so that it was level with my circle.

To finish off this card, I added a few Nuvo Jewel Drops in Sea Breeze as a little embellishment.

So now it’s YOUR turn. Happy Crafting!!    

Follow Simon Says Stamp on Instagram

  Do you use Instagram ?  If so please add  #ssswchallenge to your challenge entry uploads so we can see them on there too.

   You have until Wed  8am Ohio time. 1pm UK time, 2 pm CET to join in

Below is the entire DieCember release. Happy shopping!!

Cardmaking · Challenges · Design Team · Handmade Greeting Cards · Simon Says Stamp · You Tube

Thanksgiving Slimline

Hello crafty friends!! Please join me for a new challenge at the Simon Says Stamp Wednesday Challenge.  This week the challenge is

Thanks/Thanksgiving

We are showcasing Pink Fresh Studio Products this week.  If you have any of these products, we’d love to see them used, but it’s certainly not a requirement to join the challenge. 

As always, the generous folks at Simon Says Stamp will be giving away a $25 voucher to one randomly selected winner to shop at the fabulous Simon Says Stamp Store.  You can enter 5 times which means you can make 5 different projects following this week’s prompt and have 5 chances to win a shopping spree!! Sounds like a win/win to me!! I’ve linked all of the supplies that I used at the end of this post. Compensated affiliate links used where possible at no cost to you.


Happy Fall Y’all!! It’s been a couple weeks since I’ve been able to make a card. I had yet another health scare. You guys should know that if I don’t post every week, then I’m having health problems. Plain and simple. I’ve been feeling great since my last surgery in June up until about 2 weeks ago. I just started to feel like I was dehydrated, which happens all the time. I go in for fluids and I’m good to go. But they always do blood work just in case and this time my blood work came back not so good. My kidneys aren’t functioning properly and my sodium is super low, even though I was going in every other day for a bag of fluids. So of course, they shipped me down to the San Francisco Emergency Room because they just don’t know what to do with me up here. Long story short, we’re keeping an eye on it. They don’t know why it’s happening. I have malabsorption problems so that could be it but we don’t know for sure. But I’m feeling better and I was starting to dream about crafting again so I knew it was time to get back in my craft room and create.

I don’t usually make Thanksgiving cards. I love the Autumn colors, but I always have a hard time creating something Fall-ish for some reason but I decided to just go for it this week.

For this card, I started out with a piece of Arches Cold Press Watercolor paper and I had purchased the PinkFresh Studio Slim Diagonal Stitched Rectangles die to use for this challenge but I could not find it for the life of me so I ended up using the Wonky Stitched Wilderness die by Trinity Stamps. I took the Thanks Autumn stamp set and I heat embossed it with gold embossing powder. Then I masked off the right side of the image and embossed it again so that it would fill the entire background.

I used some color burst powders that I had in my stash to color this beautiful image. I took some gold watercolor paint and splattered it all over the background along with a dark brown.

I had this gorgeous blue embossing powder in my collection that I thought would pair perfectly with these Autumn colors so I heat embossed it on a scrap piece of vellum and then cut it out with the largest of the sentiment labels die.

I took some double sided adhesive strips and placed it on the back of each letter so it would stay nice and smoothly popped up but hidden from view.

I added a few golden sequins and added a little Honey Gold Glitter Nuvo Drops in each center. I attached my card front to a Soft Navy background and attached it to a top folding card base. I used Neenah Desert Storm 100 lb. card stock for my base.

I still wanted to use Pink Fresh Studios so I used the Hugs and Good Vibes stamp set and stamped the envelope so that it reads, “Sending you a big hug with a fold in the middle.” I love that!! That sentiment is the reason I bought this stamp set.

So now it’s YOUR turn. Happy Crafting!!    

Follow Simon Says Stamp on Instagram

  Do you use Instagram ?  If so please add  #ssswchallenge to your challenge entry uploads so we can see them on there too.

   You have until Wed  8am Ohio time. 1pm UK time, 2 pm CET to join in

Cardmaking · Challenges · Design Team · Handmade Greeting Cards · Simon Says Stamp · You Tube

Laughing Zoo Crew

Hello crafty friends!! Please join me for a new challenge at the Simon Says Stamp Wednesday Challenge.  This week the challenge is

Layer It Up

We are showcasing Paper Rose Products this week.  If you have any of these products, we’d love to see them used, but it’s certainly not a requirement to join the challenge. 

As always, the generous folks at Simon Says Stamp will be giving away a $25 voucher to one randomly selected winner to shop at the fabulous Simon Says Stamp Store.  You can enter 5 times which means you can make 5 different projects following this week’s prompt and have 5 chances to win a shopping spree!! Sounds like a win/win to me!! I’ve linked all of the supplies that I used at the end of this post. Compensated affiliate links used where possible at no cost to you.


I have a fun, but simple card to share with you this week. I decided I needed these Laughing Animals in my life. I love laughter, I love seeing people laugh, I love hearing it, I have been known to start laughing myself even if I don’t know what’s so funny, just because hearing my loved ones laughter makes me do it as well.

For starters, I took a piece of Tim Holtz Watercolor Card Stock and I stamped these funny guys using Ranger’s Archival Jet Black Ink. I thought they would be really fun to watercolor using distress inks so I started with some Scattered Straw and Walnut Stain and I watercolored my giraffe. Next I colored my elephant with Pumice Stone and added a few shadows to my zebra using Hickory Smoke.

I cut the image out using a Stitched Mod Rectangle die since I didn’t have the matching die. I added a little color to the sky with Tumbled Glass and finished off the bottom with Mowed Lawn and Twisted Citron.

I added some foam tape to the back and popped it up on some patterned paper. The patterned paper matched perfectly! I felt it needed a bit more color so I added everything to a piece of Teal card stock. That wasn’t quite enough color for me so I picked out a bunch of colored card stock and using the Slimline Scallop Frame die by Simon Says Stamp, I die cut the Happy Birthday out of each color. The colored card stock I used was Doll Pink, Orange Peel, Banana, Green Apple, Island Blue and a purple I had in my stash.

Now I had my color, but I needed some sparkle, some shine. I went over each letter with a glitter pen and topped them off with some Nuvo Crystal Glaze. That combination adds the PERFECT amount of sparkle and shine. To finish it off, I added a few beautiful aqua pearls from Studio Katia called Bora Bora. Lastly, I added a pink bow for a little extra sparkle. I attached everything to a top folding card base.

So now it’s YOUR turn. Happy Crafting!!    

Follow Simon Says Stamp on Instagram

  Do you use Instagram ?  If so please add  #ssswchallenge to your challenge entry uploads so we can see them on there too.

   You have until Wed  8am Ohio time. 1pm UK time, 2 pm CET to join in

Cardmaking · Challenges · Design Team · Handmade Greeting Cards · Simon Says Stamp · You Tube

Miss You, Love You

Hello crafty friends!! Please join me for a new challenge at the Simon Says Stamp Wednesday Challenge.  This week the challenge is

Make It Sparkle

We are showcasing Stamping Bella Products this week.  If you have any of these products, we’d love to see them used, but it’s certainly not a requirement to join the challenge. 

As always, the generous folks at Simon Says Stamp will be giving away a $25 voucher to one randomly selected winner to shop at the fabulous Simon Says Stamp Store.  You can enter 5 times which means you can make 5 different projects following this week’s prompt and have 5 chances to win a shopping spree!! Sounds like a win/win to me!! I’ve linked all of the supplies that I used at the end of this post. Compensated affiliate links used where possible at no cost to you.


I’m in love with this image by Stamping Bella called Curvy Girl With a Diamond. Isn’t she just beautiful? I started out by stamping her on X-Press It Blending Card so that I could color her with my Copic Markers. While I still had her in my Misti, I stamped her again only this time I only stamped the diamond and I stamped it on a piece of the Holographic card stock by Simon Says Stamp.

I accidentally stamped it using Memento Tuxedo Black Ink because that’s what I used to stamp my girl but I quickly realized that the Memento ink wasn’t going to stick so I stamped it again using StazOn Jet Black Ink. Then I fussy cut the diamond out.

I colored her with my Copic Markers. I’ve listed the colors that I used below. Once she was colored, I fussy cut her out as well.

Copic Markers Used:

Skin: E00, E11, E13, R20, R30

Hair: E51, E55, E57

Dress: R81, R83, R85, V000, V01

Flowers: R81, R85, YR00, YR01, G46, G43, Y19

I quickly glued my fussy cut diamond in place because I couldn’t wait to see how it was going to look once it was put together. I immediately loved it!!

I chose a patterned paper for my background from the Moda Scrap paper pack called Let Your Soul Bloom. It’s so pretty and I thought it was perfect for this card. I die cut the patterned paper using a Stitched Rectangle Die.

For my sentiment I used two from the Clean Line Everyday stamp set by Simon Says Stamp and CZ Design. I heat embossed them on black card stock with Alabaster White Embossing Powder. Then I used the coordinating dies to cut my sentiments out.

I added some craft foam to the back of the patterned paper and attached it to an A2 size piece of Rose Gold Glitter card stock using Scor Tape. I find the scor tape works really well with glitter card stock. For everything else I used liquid glue.


I adhered everything to a side folding card base. I attached a little piece of craft foam behind the diamond that hangs off of the card stock because I’m going to be mailing this across the US. For a finishing touch, I used my Spectrum Noir glitter pen on the flowers and the ruffles of her dress and then my card was ready to be mailed.

So now it’s YOUR turn. Happy Crafting!!    

Follow Simon Says Stamp on Instagram

  Do you use Instagram ?  If so please add  #ssswchallenge to your challenge entry uploads so we can see them on there too.

   You have until Wed  8am Ohio time. 1pm UK time, 2 pm CET to join in

Cardmaking · Challenges · Design Team · Handmade Greeting Cards · Simon Says Stamp · You Tube

Spooky Village

Hello crafty friends!! Please join me for a new challenge at the Simon Says Stamp Wednesday Challenge.  This week the challenge is

Anything Goes

We are showcasing Lawn Fawn Products this week.  If you have any of these products, we’d love to see them used, but it’s certainly not a requirement to join the challenge. 

As always, the generous folks at Simon Says Stamp will be giving away a $25 voucher to one randomly selected winner to shop at the fabulous Simon Says Stamp Store.  You can enter 5 times which means you can make 5 different projects following this week’s prompt and have 5 chances to win a shopping spree!! Sounds like a win/win to me!! I’ve linked all of the supplies that I used at the end of this post. Compensated affiliate links used where possible at no cost to you.


I LOVE these Anything Goes challenges!! I had so much fun making these cards. I knew as soon as I saw this challenge what stamp set I wanted to use and I knew what I wanted to do for the backgrounds so I jumped right into this project. The stamp set I used is called Spooky Village by Lawn Fawn. I don’t have the die so luckily I was able to use my Brother Scan N Cut to cut all of these out. I started to fussy cut them and quickly realized it was going to take me forever!! So needless to say the die is now sitting in my shopping cart at Simon Says Stamp.

I started out on Bristol Smooth Card Stock and I ink blended 3 backgrounds. I used Distress Oxides starting with Ripe Persimmon, Fired Brick and ended each with Black Soot. The next background is Twisted Citron and Mowed Lawn and lastly Wilted Violet and Dusty Concord.

Using X-Press It Blending Card, I stamped out all of my images using my Misti 2.0 and Memento Tuxedo Black ink. I stamped all images out on three separate sheets and copic colored each to match my backgrounds.

I did some more ink blending for my grass using Mowed Lawn, Lucky Clover, Peeled Paint and Black Soot. I used the Simon Says Stamp Grassy Edges die to cut my grass out.

Before gluing everything in place, I sprinkled some water and Black Soot on the backgrounds. I didn’t on the purple background though only because I forgot and there’s not much of the purple background showing.

I used more grassy area on the purple card and I didn’t really love it so I made some adjustments for the next two.

How cute are these little ghosts??? Lawn Fawn has the BEST accessories in their stamp sets. I love all of the little pieces that make up this scene.

I tried to get an angle so that you could see all of the little dimension pieces because I think it’s all about the little details that make a card amazing.

I heat embossed the sentiment using Brutus Monroe’s Alabaster White embossing powder.

I used the thin black foam squares to pop up little details. Here’s a few more pictures just for fun.

So now it’s YOUR turn. Happy Crafting!!    

Follow Simon Says Stamp on Instagram

  Do you use Instagram ?  If so please add  #ssswchallenge to your challenge entry uploads so we can see them on there too.

   You have until Wed  8am Ohio time. 1pm UK time, 2 pm CET to join in

Cardmaking · Challenges · Design Team · Handmade Greeting Cards · Simon Says Stamp · You Tube

Underwater Layered Shaker Card

Hello crafty friends!! Please join me for a new challenge at the Simon Says Stamp Wednesday Challenge.  This week the challenge is

Midsummer Blues

We are showcasing Memory Box Products this week.  If you have any of these products, we’d love to see them used, but it’s certainly not a requirement to join the challenge. 

As always, the generous folks at Simon Says Stamp will be giving away a $25 voucher to one randomly selected winner to shop at the fabulous Simon Says Stamp Store.  You can enter 5 times which means you can make 5 different projects following this week’s prompt and have 5 chances to win a shopping spree!! Sounds like a win/win to me!! I’ve linked all of the supplies that I used at the end of this post. Compensated affiliate links used where possible at no cost to you.

These Memory Box dies are so fun to use, I had never used them before so I thought they’d be perfect for this challenge!!

  I cut all 3 layers out using Bristol Smooth card stock and went to work ink blending each layer except for the very top layer which is the Underwater Collage. For the background layer, I used the Honey Bee Stamps Ocean Scene Builder stencil to add a few rays shining through. I used Tsukineko Delicata White Shimmer ink over the rays so you see this beautiful pearly sheen when you look at it in the light.

Once I had all of my layers cut out, I thought this would look really cool with some dimension so I added craft foam to 2 of the layers but left the top layer foam free so that it wouldn’t start to get too bulky. At this time I thought a shaker card would be fun so I also added some acetate. I had to add a couple of fish so I colored a few from Lawn Fawn’s Finastic Friends stamp set with my copic markers. I used two layers of acetate so that I could glue my fish on one layer to make them look like they were floating in the water. Behind that back layer of acetate is where I put my shaker bits. I used several different types of sequins which I’ve linked below.

For the top layer of acetate I used Heat Resistant Acetate so that I could heat emboss those lovely bubbles from the Stamping Bella Tiny Townie Mermaid stamp set in white embossing powder. My sentiment is from Lawn Fawn’s Keep On Swimming stamp set which I white heat embossed on black card stock. I attached my shaker window onto an A2 size piece of Fog card stock and then attached everything to a top folding card base.

To finish off my card, I added a few Iridescent Bubbles by Studio Katia over some of the heat embossed bubbles and also a few just on my card front to tie everything together. For a step by step tutorial, please watch my video above or head over to my YouTube channel.

So now it’s YOUR turn. Happy Crafting!!

And the winner from last week’s giveaway is Christine!!! Congrats Christine and thank you playing along. Email me at happyinkdesigns@gmail.com with your mailing address and I’ll send them out to you. 😊

Follow Simon Says Stamp on Instagram

  Do you use Instagram ?  If so please add  #ssswchallenge to your challenge entry uploads so we can see them on there too.

   You have until Wed  8am Ohio time. 1pm UK time, 2 pm CET to join in

https://linkdeli.com/widget.js?id=f5e8378456858c916708
Cardmaking · Challenges · Design Team · Handmade Greeting Cards · Simon Says Stamp · You Tube

Create Your Own Background – And Play To Win Distress Inks!!

Hello crafty friends!! Please join me for a new challenge at the Simon Says Stamp Wednesday Challenge.  This week the challenge is

Use Your Favorite Tool

We are showcasing Tim Holtz Products this week.  If you have any of these products, we’d love to see them used, but it’s certainly not a requirement to join the challenge. 

As always, the generous folks at Simon Says Stamp will be giving away a $25 voucher to one randomly selected winner to shop at the fabulous Simon Says Stamp Store.  You can enter 5 times which means you can make 5 different projects following this week’s prompt and have 5 chances to win a shopping spree!! Sounds like a win/win to me!! I’ve linked all of the supplies that I used at the end of this post. Compensated affiliate links used where possible at no cost to you.


What’s your favorite craft tool? Is it your paper trimmer? Your die cutting machine? How about Distress Oxide inks? Well, those are my 3 favorite tools. I simply could not narrow it down any narrower. I’d love to hear what your favorite tool is. In fact, let me know what your favorite tool is and I’ll randomly select a winner to win 5 distress ink pads. I have 2 distress oxides and 3 distress ink pads to give away. All full size!! I’ll announce the winner in next week’s post.

Head over to my YouTube channel to see more of my videos

Do anyone struggle with patterned paper like I do? I love it. I have tons of it. But I rarely use it on a card. I like to keep things pretty simple and patterned paper just seems so over powering sometimes. So busy. Yet I see people use it all the time and make it work beautifully. I can’t do that for whatever reason. So when I thought about using the Baubles Layering Shifter Stencil by Tim Holtz to create my own background, I thought in a way, I’m creating my own patterned paper!! No need to be intimidated by it. Yes I said it. Patterned paper intimidates me. Unless I create it myself…

Check out my video above if you’d like to see a detailed tutorial of how I created this background. It was super easy and super quick to create.

I taped an A2 piece of Bristol Smooth card stock to my glass media mat and taped the Baubles Shifter Stencil on top using purple tape. Then I ink blended several distress oxide inks using a sponge dauber. I started with Picked Raspberry then moved on to Carved Pumpkin, Squeezed Lemonade, Twisted Citron, Peacock Feathers, Mermaid Lagoon and ended with Wilted Violet.

I thought the background looked better going horizontally with the sentiment that I chose. I used the Proud of You wafer die by CZ Design. I chose this one because I hadn’t used this die yet and I don’t have any cards like this in my stash. Plus I wanted a sentiment with a shadow die so that I could use black and white card stock to really make it pop off of this colorful background.

I thought it needed a little something extra so I used one of my all time favorite dies from the Frames die set by Simon Says Stamp. I cut it out using black card stock. To bring it all together, I cut my background piece down to 4″ x 5.25″ and attached a piece of white craft foam to the back. Then I adhered it to a piece of black card stock cut to 4.25″ x 5.5″ aka US A2 size. I attached my whole card front to a top folding A2 size white card base.

To finish off my design, I added a few Metallic Silver Jewels by Pretty Pink Posh and then I was done!

Don’t forget to leave me a comment and let me know what your favorite craft tool is and I’ll randomly select someone to win 5 distress ink pads!! I’ll announce the winner in next week’s post.

So now it’s YOUR turn. Happy Crafting!!    

Follow Simon Says Stamp on Instagram

  Do you use Instagram ?  If so please add  #ssswchallenge to your challenge entry uploads so we can see them on there too.

   You have until Wed  8am Ohio time. 1pm UK time, 2 pm CET to join in

https://linkdeli.com/widget.js?id=f5e8378456858c916708